Showing posts with label Paper Crafts. Show all posts

Monday, August 17, 2020

Autumn Shaker Card

If you love Fall and Cardmaking as much as we do, we thought you'd enjoy 
this lovely Autumn Shaker Card by Design Team Member Nadine Carlier.


Nadine's Autumn Shaker Card uses beads, glitter and a lot of various embellishments all conveniently stored in her Deflecto 4-Drawer Stackable Cube Organizer.  

The Stackable Cube Organizers are available with a variety of options to create the perfect storage solution for your craft room or office.  They help keep your workspace clutter-free and your supplies close at hand.


You can read more about the Autumn Shaker Card on Nadine's blog here.

Share your projects and ideas with us using #DeflectoAtHome #DeflectoCrafts on social media.

Monday, August 3, 2020

Foam Board Ice Cream Front Door Hanger

Lynn Lilly shows you how to make a DIY Ice Cream Front Door Hanger!

I love switching up my front door decor on the regular and I have been experimenting with creating front door hangers with foam board. A lot of die-cut front door hangers are made from wood but they can be pricey. So I thought why not give foam board a try and it has worked great and withstands weather! Whether you are an everyday crafter or someone who makes occasionally, it definitely helps to have your supplies organized. My go-to organizer for projects and long term storage is my DeflectoStackable Storage Caddy. It is great for general storage or if you are making a lot of the same type of project that uses the same materials like I have been with front door hangers it works great to dedicate a caddy with all the supplies.


Featured Storage Container: Deflecto Stackable Storage Caddy

Materials:

     18" x 24" Foam Board

     Pencil

     Ruler

     Box Cutter or Craft Knife

     Acrylic Paint and Brush

     Dimensional Puffy Paint

     Decoupage

     Hot Glue Gun & Glue or Industrial Glue

     Rope/Twine

Project Directions:

1. Draw the shape of a cone, ice cream scoop, and a cherry on the foam board.

2. Use the box cutter to cut out each piece.

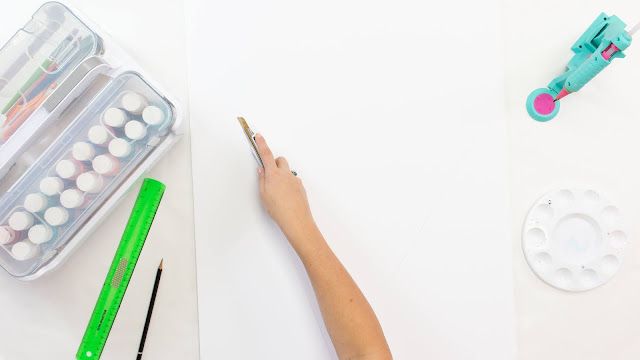
3. Paint the cone brown acrylic paint and let it dry.


4. Once the cone is dry paint criss-cross cone lines in gold acrylic paint. Add texture with squiggly lines over the brown. Mix white into the original brown to create a light brown. Let the cone completely dry.

5. Paint the ice cream scoop pink. Let it dry. Next mix the pink with white to get a lighter pink and paint polka dots all over the ice cream scoop. Next, use the dimensional puffy paint to add sprinkles. Let it completely dry.

6. Paint the cherry red and the stem black. Let it dry. Once it is dry add some reflection lines to the cherry with white.

7. Glue the ice cream scoop to the cone and the cherry to the scoop.

8. Paint the entire piece with decoupage to weatherproof.

9. Glue a string to the back to hang it on the door.

TA-DA!!! You have your very own fun, front door hanger. You can take this same technique and make so many other shapes. I have already made a watermelon slice and a popsicle. The popsicle has been hanging on my door for weeks and withstood so many storms!

The best part about this project is that clean-up was so easy as I just popped all my supplies back in my Storage Caddy!

Share your projects and ideas with us using #DeflectoAtHome #DeflectoCrafts on social media.


Friday, May 29, 2020

Quick and Easy Rainbow Encouragement Cards


Create Rainbows of Color with these Quick and Easy Cards of Encouragement
created by Design Team Member, Beth Watson. 


How to Create Rainbow Cards of Encouragement

Materials Needed:

  • Mixed Media Art Paper
  • Dual Brush Tip Art Markers
  • Blank Cards with Envelopes
  • Adhesives
  • Circle and Heart Templates
  • Variety of Colored Cardstock 
Featured Storage:  Stackable Cube Organizers


Directions:

  • Create patterned paper by drawing lines, in rainbow order, on four sheets of mixed media paper. Create two horizontal and two vertical sheets. This paper was from a pad, so I removed the perforated strip along the side. (Use any combination of colors that you want to create a custom rainbow.)

  • The cards are made with one half of an 8 1/2″ by 11″ piece of cardstock (8 1/2″ by 5 1/2″) folded in half to create a 4 1/2″ by 5 1/2″ card. 
  • Start by cutting four sections of the homemade rainbow paper into rectangles to fit the card fronts. I sketched and lettered messages onto hearts and circles with Brush Pens. 
  • Attach to the card fronts with a tape runner. Mix and match the hand-lettered words of encouragement with printing. Use letter stickers if you don’t care for your hand lettering.

  • For the second set of four cards, trace a variety of hearts and circles with the templates onto the handmade rainbow paper. You could also use paper punches. Mix and match adding the circles to colored cardstock with adhesive and foam tape for added dimension. 
  • Layer the embellished cardstock onto the blank card fronts. 
  • Add words of encouragement with a permanent marker, hand lettering, and printing.


  • For the third set of four cards, trace a variety of hearts and circles with the templates onto the rainbow and colored cardstock paper. You could also draw your templates. Mix and match adding the hearts to the card fronts and colored cardstock foam tape for added dimension.
  • Layer the embellished cardstock onto the card front blanks with adhesive tape runner.
  • Add words of encouragement with hand lettering, and printing.

Beth loves using the Deflecto Stackable Cube Organizers to keep her embellishments 
and work surface organized.  

Beth says..."Being organized allows me to be more productive in my creative flow.  Having everything at arms reach and visible through the plastic drawers has been a game-changer.  
I love how this storage unit looks on my work table in my studio."  (and we love it too!)

For more fun projects from Beth and how she uses the organizers visit her blog here.


Share your projects and ideas with us using #DeflectoAtHome #DeflectoCrafts

Tuesday, May 26, 2020

Thank A Nurse Card

Card Designed By Nadine Carlier

Nurses do a lot and put up with a lot and don't always get the Thanks they deserve.

So if you get a chance, don't forget to Thank a Nurse.


This is how Design Team Member Nadine Carlier uses hers...

"I do a lot of ink blending and have a lot of different ink blending tools.  Some of them are small and hard to keep organized. I started using the Deflecto Stackable Cube with 2 Drawers and also with 4 Drawers. Because I have so many sponge daubers, I took one of the bigger drawers from the Deflecto 2 Drawer Cube and exchanged it with 2 of the smaller drawers from the Deflecto 4 Drawer Cube to fit all the daubers in and so that all of my ink blenders are all in the same cube."


There are several different styles of Deflecto Stackable Cube Organizers that lets you 
create custom storage.  Keeps your workspace clutter-free and supplies close at hand.


For More fun projects from Nadine you can visit her blog here.

Share your projects and ideas with us using #DeflectoAtHome #DeflectoCrafts

Friday, May 1, 2020

Coloring a Rainbow


Is rainbow your favorite color?  

Learn how to draw, doodle and color a bright and cheery rainbow with Design team member Beth Watson.   


Featured Storage Container:  Interlocking Marker Organizer

Materials:

  • Dual Tip Brush Art Markers
  • Fine Tip Permanent Marker
  • Pencil
  • Marker Paper
  • Light Box
  • Downloadable Version below↓


Step #1

Always start out with a sketch.  I have a spiral-bound book that I draw rough outlines of all my doodles and printable ideas.  This is a great way to save all those quotes I randomly come across.  


Step #2 

The Cricut BrightPad is one of my favorite tools when it comes to creating printable files, doodles and drawings.  By layering the rough sketch under the smooth printer paper I can quickly and easily create different versions of the same quote.  Ink in the image with a medium grey pen.  


Step #3
  • Next, take the shadow quote and layer a new piece of smooth printer paper on top.  
  • Trace around the quote with a fine tip permanent marker.

Step #4
  • Color the background in the lightest of blue markers.
  • Letter the darker words with the brush tip of the black marker.
  • Outline the block letters using the bullet tip of the marker.

Step # 5
  • Start out with a sample color palette to make sure the final piece will have the perfect combination.
  • Add the rainbow perspective to the word FEELS at the bottom of the quote. 
  • Outline the colors and the quote with the bullet tip of the black marker.

For more information on Beth's project and the free downloadable printable.
Related Posts Plugin for WordPress, Blogger...