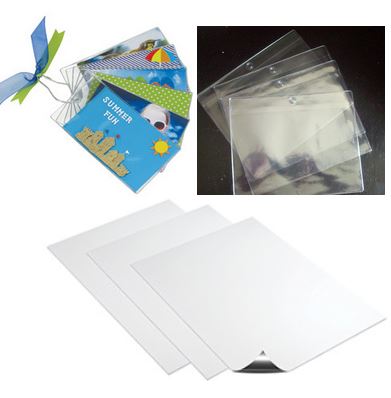
Showing posts with label Flexible Pouches. Show all posts

Friday, November 24, 2017

Christmas Gift Card Holder.


Howdy, everyone! It's Anita here today to share a fun project with you. Since my kids are all grown, we tend to give a lot of gift cards at Christmas time. I love to find new ways to present the gift cards and this year I am using the Deflecto Flexible pouches. They are so very easy to decorate, and they turn out super cute!


Deflecto Flexible Pouches come in two sizes, and they are great for all kinds of projects! I used the smaller size for this gift card holder. These pouches are also great for storing paint samples and color combos; they are super handy to carry in your purse when you are shopping. You can also use the large size pouches to create a mini album - check it out here.


I started by covering both sides of the pouch with patterned paper. I used the new Milk and Cookies line from Doodlebug Designs. It is so cute! On the back side of the pouch where the plastic overlaps, I adhered a smaller piece of paper to slip inside.


I adorned the front of the pouch with more paper from the Milk and Cookies line. I love to add faux stitching to my projects - it just adds so much visual depth to a piece! I layered die cut stickers, paper accents, and some amazingly cute Shape Sprinkles to embellish this side. My last step was to outline the sticker shape with a thin black pen - it just makes the shape pop off the page. I am in LOVE with the Stabilo Point 88 Thin Line pens. Those things are amazing an give the best thin line!


On the reverse side I added more paper accents. The sentiment is created with Joy Embroidered Letters. These two colors were perfect for this paper line, and this font is so fun and playful. I cut a matching piece of cardstock to fit inside the pouch and adhered the gift card using temporary tape. Punch a hole at the end of the cardstock and tie on lots of ribbons to finish it off.



Who wouldn't love to get this super cute Gift Card Holder? I am pretty sure there are going to be a few of them floating around the tree on Christmas morning here at our house. To see more great ideas using Deflecto Products be sure to check out our Pinterest page and Facebook!

Friday, July 28, 2017

Using Deflecto's Pouches to Create a Calender

Hello, everyone!!! I'm here today to show you how to use Deflecto's Pouches to create a calendar.

These pouches come in a 7-3/8 x 6 inch size and are packaged 5 to a pack.  They can be used for tons of things: a recipe card holder, picture holder, display piece or even a banner!!

I created a flip calendar.  Let's take a look:


I used 6 pouches to create this cute calendar.  Two months in one pouch.

Here's how:
I used the Cinch to punch evenly spaced holes in each pouch. 


Then I created a cover and put the book to together.


Create your calendars and add them to the pouches.


Before you put all of the calendars inside their pouches, use an enamel dot to make off important dates.


Nice and simple!! I keep this calendar on my desk so that I do not miss another birthday.

So what do you think? Will you use the flexible pouches to create a calendar for yourself?  I would love to hear from you.

Thanks for stopping by, I hope you were inspired here today.


Make sure to follow us on Pinterest and Facebook for more inspiration!


Thursday, July 27, 2017

Guest Room Closet Make-Over.


The closet in my Guest Room has been abused and neglected for years. 
I'm blaming the kids, but truth be told, I may have had a small part in it myself.
Because I'm always needing more storage for my ever expanding crafting supplies, I decided to take over the closet for myself.
After clearing everything out, I purchased a large cubby/bookcase from Ikea and treated myself to some nice fabric bins from Target.


To help keep me organized...
I labeled each bin using Small Flexible Pouches and hung them on the bins with Pear Clips.
Everything’s neatly contained and it looks pretty.


Besides all the extra craft storage…
I now have room for finished albums, my camera bag and more.


You may have noticed there are still a few toys left in the closet. (always a work in progress)
I used the Deflecto Rotating Carousel Organizer for Lego storage. (the boys love it)
You can see more of the Guest Room Closet Make-Over here.

Tuesday, July 25, 2017

Flexible Pouch Personalized

Hello everyone, Martha Lucia here to share with you what I made with the fabulous Deflecto Flexible Pouches 3"x5" that can be used for many things. Take a look at my idea:


I decided to personalize each to be used as a name tag on a Simply Charming Bag, the custom bags that we use to carry the scrap tools or materials.  Now I have one exclusively to carry my die cuts:


The process to make these is very easy:
  1. Cut the letters of the name using gold glimmer paper and arrange the letters on the bottom part of the Flexible Pouch.
  2. Secure this space to avoid the letters moving using the Fuse Tool.
  3. Using a Vellum piece of card stock, stamp the image that you want to have as background with VersaMark and Gold Embossing Powder.
  4. Melt the powder with the heat tool and insert the piece on the Flexible Pouch.
  5. Add sequins with different colors to have the shaker effect.
  6. Close the Flexible Pouch with the Fuse Tool.
  7. Hang or use as you prefer.


Easy and simple! And the best part is that you can personalize and give to each Flexible Pouch a different style if you want because their material is totally clear, durable and finished, that means that the corners aren't pointed, and you can't hurt yourself with them.

Thank you for stopping by, and I would love to know what do you think or if you decided to create your own personalized pouch with Deflecto.

See you soon!

Friday, July 21, 2017

Patriotic Mini-Album


If you took lots of photos this July 4th, you need this fun mini-album!

Made with Deflecto's large flexible pouches and pear clips and just a couple of sheets of paper, this album is small in size, but big on Fourth of July fun!

Materials:

  • white and blue cardstock
  • patterned paper in patriotic colors 
  • July 4th-themed stickers 
  • red, white, and blue buttons (various sizes)
  • tape runner
  • adhesive dots
  • adhesive foam squares
  • scissors
  • paper trimmer
  • ribbon
  • Deflecto large flexible pouches 
  • Deflecto pear clip
How to:
  1. Using a paper trimmer, cut 5 pieces of white cardstock to 5" x 7".
  2. Using patterned paper and blue cardstock, create layouts on both the front and back of each piece of white cardstock. 
  3. Embellish each page with stickers and buttons. Use foam squares to "pop up' some of the stickers to give your page dimension. Attach buttons using adhesive dots.
  4. Once all pages have been completed, place each page into the pouches.
  5. Use a pear clip as a ring to hold the pouches together in an album.
  6. Cut 6" lengths of ribbon. Tie around the pear clip. 


Tuesday, July 18, 2017

Bridal Shower Mini Albums with Deflecto Vinyl Pouches

Summer greetings!  Many bridal showers and weddings are happening this time of year!  My daughter got married last Summer, and we had a bridal shower for her last July! I had lots of pictures to share and wanted to make a gift of a mini photo album for family and friends who were involved in the shower and wedding.  Deflecto flexible pouches are the perfect solution to keeping the photos pristine through a lot of handling.  I will show you how I made my mini albums below.  


You will need:

Deflecto:  Flexible Pouches 5" x 7" #20020CR; 3" x 5" #20019CR
Deflecto:  Pear Clip, 2-1/2" #20012CR (one for each album)

12 x 12" Memory Papers:  Contrasting papers of the same color family
Vinyl for lettering:  Colors of your choosing
Vinyl transfer paper
Paper Trimmer
Adhesives
Ribbons:  Colors of your choosing
Scissors
Die-cutting machine


Directions:

First, select your photos and make sure they are sized small enough to mat and apply to the background paper with plenty of area around each photo.

Select colors of solid and patterned papers that will coordinate throughout the mini album.  I used a 12" x 12" paper pad, and they had already coordinated the papers!

Create a background for your page. Cut slightly smaller than 5" x 7" paper for your background page. Cut a mat paper slightly larger than the photo.  A double mat can be applied to the focal point photo if you prefer.

Check your layout but do not apply adhesive until you have placed the photos.  Dry placing the photos before applying adhesive is a sure way to get them the way you like them before adhering them to the page.

Working from the front of the album; right side up; you will need to reverse the position of each scrapbook page on the back or reverse side of each page.  I arranged each page and then inserted into the front and back of each pouch.

After completing all of the album pages; put them in a pile with all of the edges matching.  Cut a 4" x 7" piece of adhesive vinyl.  Adhere it to the top edges' front and back to "bind" the pages together.

Punch a hole in the vinyl matching to the holes in the stack of pouches.  Attach the pear clip.

Cut and tie ribbons to the pear clip.  One ribbon or ten!  Up to you! Trim the ribbon tails at an angle.


Cut a vinyl monogram B and adhere it to the front of the 3" x 5" pouch.
Cut the word Bride from another color of vinyl and adhere to the top of the B as shown.
I recommend cutting the letter and word from memory paper first to make sure it is the right size and fits on top of the pouch.


BONUS!


I made a mini album using the 3" x 5" pouches.  I used the same technique as shown above.  My daughter has a long haired dachshund named "Riley."  This mini album was dedicated to her. 


Below is a picture of Riley all decked out for the 4th of July!   


Thanks for stopping by!


Make sure to take time to enjoy the small blessings along the way and;

Live Life with a Flourish!

Marilyn

Friday, July 14, 2017

DIY Easy Luggage Tags

Hello! Nadine here today sharing some super easy luggage tags I created for a family vacation we are going on soon.  I used Deflecto's Flexible Pouches and simply slipped in some scrap paper pieces into the pouches and wrote our names, addresses and phone numbers on them.  You can customize them to however you like. I have made these before but with a cruise theme.

Once you have them decorated the way you like, all you have to do is attached them to your luggage with Deflecto's Pear Clips, and you are ready to go!


Thank you for stopping by and hope I inspired you to create your own luggage tags for your next vacation.


Thursday, July 6, 2017

Die Cut Organization

Hello, crafty friends! Martha Lucia here to share with you the easiest and practical way to organize all your die cuts and see exactly what you have and keep them all in one place after each use. It's a simple and practical solution, take a look:


On this project, I used three different Deflecto products, the Pear Clip to tie all the Flexible Pouches (7-3/8"x6") that I used to storage and carry my different die cuts. To keep all the die cuts in place, I used Magnetic Craft Sheets, and the best part is that I can used both sides of the pouch and the magnets.


For one side, I decorated the border of pouch with different colors of washi tape to identify the type of die cut that is inside. And for the back side of the washi tape I added a piece of card stock with the category of the die cuts. I have single die cuts, borders, tags, elements, molds, animals, etc., and all are from different brands or manufactures.


I definitely love the transparency of all Deflecto organization products, since it is very easy to know what we have and see through it as well as keeping control of things and making sure everything is organized.


Another advantage that I found on these Flexible Pouches is that the closing border lets you secure the magnet sheet and keep it inside of the pocket without worrying that the content will slip out of the pouch. In other words, it is secure for the small or large pieces if you are running and forgot to secure the die cut over the magnetic sheet.

These Flexible Pouch came in two sizes, for this organization project I used large size (7-3/8"x6"), but then I will show a creative project with the Flexible Pouch 3"x5" that I am sure you will love! Super easy, practical and useful! What do you think?

I would love to hear from you. See you soon!!!

Tuesday, August 30, 2016

Luggage Tags For The Newlyweds!

The bride and groom are off on their honeymoon! Whether they travel by car, bus, train or plane; they might get some special service by sporting these fun tags on their luggage!

Here is what you will need:

Deflecto 3"x 5" flexible pouch #20019CR (one each); pear clip #20012CR

JOY 1" high embroidered letters by the sheet: pink and black

scrapbook papers: black and white stripe

cardstock: black, teal, white

glitter tape: 1/2" wide gold

paper flowers: 3/4" teal; 1/4" dark pink

ribbon scraps: white sheer, teal satin, white satin, teal polyester

adhesives

scissors

paper trimmer


Instructions:

1. Cut the striped paper to fit in the pouch. Cut, layer and adhere the other papers to the striped paper as shown. Place inside the pouch.

2. Adhere the letters to the outside of the pouch using a strong glue meant to hold on plastic. I used a dimensional medium. Allow to dry.

3. Embellish with flowers and glitter tape. Ribbons: Cut and fold the ribbons in the middle. Push the middle of the ribbons through the hole in the pouch; make a loop. Pull the ribbon tails through the loop and close the loop. Trim the ribbon tails at an angle.

4. Finish: Open the pear clip and attach it to the pouch through the same hole as the ribbons. Close the clip. Ready for the honeymoon!

I hope you got some inspiration here today. I always like questions and comments. They can be left below.

Make sure to follow Deflecto Crafts on Pinterest and Facebook for more inspiration!


Monday, August 15, 2016

Wafer Thin Die Storage

Need an easy way to store you wafer thin dies, check out Erin's method using the flexible pouches and the magnetic sheets to store her dies in a memory book.


I used a couple of different methods to store the dies, but the main idea is to use a thick cardstock with a Deflecto magnetic sheet glued to it with Beacon Power Tac glue and slip these magnetic sheets into a plastic Deflecto pouch (or when I ran out a plastic wrapper the dies came in) and then place the pouches in a Heidi Swapp Memory book I had laying around.
 

Check out my full video tutorial on how I made this DIY Wafter Thin Die Storage below!


Now I can find my dies very easily so I will use them more and also store them on a shelf and they look pretty and not just a giant mess!!

I can even store my stamps and dies that work together in one pouch!!!  Double win!!

Now it is your turn, what are you going to organize today?!?!

Supplies Used
Book - Heidi Swapp
Flexible Pouches
Magnetic Craft Sheets
Various Dies - Spellbinders, Die-Namites, Craftwell, Heartfelt Creations, MFT, etc
Various Papers - Robin's Nest, Websters, etc
Glue - Beacon

Thank you for stopping by and make sure to follow Deflecto Crafts on Pinterest and Facebook for more inspiration!

Enjoy!
Erin Reed

Saturday, August 6, 2016

Mad Hatter's Tea Party Banner

Hi, everyone! Down the rabbit hole, we went for a Mad Hatter's Tea Party Bridal Shower! Above the doors that led out to the party hung a fun themed garland using Deflecto's Flexible Pouches. After the shower; the garland can be taken apart to make a keepsake album for the bride to be!


Papers were cut to fit inside the pouches.  I layered cut-out embellishments with photographs like for a scrapbook page and inserted it in the pouch.  I die cut scalloped circles of different sizes and cut each circle in two.  Scalloped decoration:  Adhere the paper layers together and then adhere to the top of the pouch.
The gold glitter letters are self adhesive, and I adhered them to the outside of the pouch after inserting the layered papers inside the pouch.
Deflecto products you will need:

Flexible Pouches - 5" x 7" #20020CR

Attach the Sign and Banner Hangers to the backs of the pouches.  Thread ribbon or jute string through the loops to hang the banner.

Hope you got some inspiration here today.  We hung this banner over the door at the bridal shower, and it led out into the yard which we had decorated with the theme.  All had a great time!  Here is another glimpse at the decorations outside the door!


Thanks for coming down the rabbit hole with us for a glimpse into the bridal shower.  Hope you got some inspiration here today.  The wedding is coming soon, and it is all DIY as well!  We are using a lot of Deflecto products for wedding signage and more.  

Make sure to take time to enjoy the small blessings along the way and
Live Life with a Flourish!


Make sure to follow Deflecto Crafts on Pinterest and Facebook for more inspiration!

Related Posts Plugin for WordPress, Blogger...