Showing posts with label Event Sign/Display. Show all posts

Tuesday, August 8, 2017

Dinosaurs for Adoption


The princess is having a dinosaur birthday party this year. My daughter wanted an "adopt a dinosaur" station at the party so the littles could pick their own favors to take home with them. I used the Deflecto™ 5 X 7 Beveled Frame for this cute little sign. I love these frames because they come apart into two pieces. I almost always decorate the front part of the frame with larger, chunky, embellishments, but I am still able to swap out the photo on the inside of the frame as often as I want!


I used some pre-painted wood embellishments found at the local arts and crafts store. I added a few leaves, and some buttons to finish off the outside of the frame. For the inside, I printed my sign using a word processing software, trimmed it to fit, inked the edges, and added some stamped leaves. Once the party is over, I am going to swap out the sign for a fun photo of the birthday girl!

Sunday, November 6, 2016

DIY Spa Party

Are you looking for a fun party idea for your tween girl? How about a pampering party?! You can provide "salon services" for her, and her friends and Deflecto can help!


I used Deflecto's new Event Kit to put together this fun and frugal party set-up. This kit is fantastic for any type of party because it contains everything you need for displaying signs, banners, and more!


For my little spa soiree, I used the 3-Tier Dessert Stand not for food, but for displaying nail polish! It makes for cute decor, and it allows the guests to choose their color easily. All I did to make it match my celebration was add some pink and black ribbon to the edge of each plate. The best part is after the party; you can take the stand apart -- it stores completely flat! On top, I used the Versa-Grip Wide Clip Sign Holders to hold the large "Pamper Party" sign. This wide clip fits on the Dessert Stand perfectly!


For the signs advertising the "spa services" the guests can pick from, I used the Angled Sign Holders. Using a hot glue gun, I added a little pink gem to each one to match the decor.


The best thing about this type of party is that it is very budget-friendly. All of the beauty supplies can be picked up at the dollar store! For less than $30, you can pamper several girls with bath poufs, nail files, nail polish, lotion, and more, and then all of those things can be taken home as party favors!

If you’re interested in purchasing the items used in this project and more, then tune in on November 28th to Create and Craft for their first ever feature of Deflecto’s new Event Kit. The perfect kit for your next party, get yours before they’re gone! Click HERE to find out where to watch!

Tuesday, November 1, 2016

A Thanksgiving Welcome Table

I always look forward to Fall and the holiday season because it is a prime crafting time for me. I love making cards to send out to family and friends. I also love to come up with other crafty things as they pop into my head. So although my scrapbooking kind of goes by the wayside, it's all good because I am still crafting! The biggest challenge I find for holiday crafting is getting it done because it is such a busy time of year. So I start early, and what is early? I start making Halloween, Thanksgiving, and Christmas cards in July! My cards are now nearly done, so I am working on my decor projects now. 

Every Thanksgiving, I set up a card table as the kid's table. I love to set it up as a decor piece before our actual meal so that my guests get a little "eye candy" while they are coming in and out of the kitchen area. Everyone also knows this is where I put some kids craft project as well. Everyone is excited to see what the kids are going to do because it is usually something enjoyable and frankly I have some adults that like to get in on the fun too, so I usually make extra for my "big kids." I like to do a "dry run" of what it will look like so that if I need to make any adjustments or add/subtract something from my design, I will know before the big day and can easily get it done now instead of later.
Here is what the table looks like all set up:


I just love how my "WELCOME" sign turned out! Deflecto's 3" X 4" Mini Frames worked perfectly for this. They also have a 1.5" X 2" Mini Frame as well if you are looking for something smaller. They both come in a package of ten. I cut the 3" X 4" rectangles and the word "WELCOME" on my Cricut Explore. I grabbed some of my leaf punches and used some Fall colored paper and punched a bunch of leaves out to jazz up my lettering. I then glued everything together and inserted my message in my Deflecto 3" X 4" Mini Frames. Here is a close up:


I have a kid's activity every year. We round the children up approx 30 minutes before dinner while myself and my helpers are letting the turkey rest, whipping potatoes, making gravy, baking rolls, heating veggies, etc....and getting everything on the table and pouring the wine and water. So while this is all going on, we can get the kids seated, and they are in place when we are ready to say grace and serve dinner. An activity or project is the perfect way to get them all settled in and for the picky eaters, they can remain seated and continue their activity. Here is a close up of this year's activity:


I made Thanksgiving Coloring Card Favors. Although Elmo is the star of this project, the bigger star is Deflecto's Angled Sign Holder. They come in a set of ten. Deflecto's Angled Sign Holder allows me to display my coloring card favors proudly; they become part of the decor, and they each wish everyone a "Happy Thanksgiving." Here is a closer look:


Now everything will go in a box and put away until the day before Thanksgiving. As you can see, I already have a table cloth, centerpiece, candles, bowl for fruit, sign, and activity all ready to go. Now on to Christmas! 

If you’re interested in purchasing the items used in this project and more, then tune in on November 28th to Create and Craft for their first ever feature of Deflecto’s new Event Kit. The perfect kit for your next party, get yours before they’re gone! Click HERE to find where to watch!

The Create and Craft Event Kit


I hope you enjoyed my project! Please feel free to leave me a comment! Make sure to follow us on Pinterest and Facebook for more inspiration!


Thursday, July 28, 2016

A Wedding "Tied the Knot" Banner!

We are looking forward to our daughter's wedding this Summer. I have the perfect embroidered letters for the banner sentiment! Follow along and I will show you how I made it!


You will need:

Sign/banner hangers:  1 for each rosette  (Deflecto #20003CR)
JOY Letters:  3" tall alphabet letters to spell:  TIED THE KNOT
cardstock:  fifteen 12" x 12" sheets of teal & black double-sided (core'dinations)
ribbon:  2-1/2" gold wire edged; 1-1/2" sheer vintage white (3 yards of each)
paper trimmer
paper scorer
die-cut machine
die for scalloped circle
punch or die-cut for 2" circle, 1" circle
glue gun
jute string
scissors


Instructions:

1.  Score one 12" piece of cardstock at 1/2" intervals.  Score across the entire sheet.

2.  With the score marks going up and down; cut out four 3" x 12" rectangles from the paper.

3.  Fold the score lines back and forth like for a fan.  Repeat for all 4 pieces.

4.  Match the ends and glue together with the same color facing up.


5.  For each rosette:  When all sides are glued together/ lay the rosette flat and push it together until there is about a 1" hole in the center.  It can be tricky trying to hold it all together, but you can do it!  Apply hot glue around the opening.  Adhere one 2" circle to cover the hole.  Repeat on the opposite side.  Make sure everything is centered properly.  Make enough rosettes for each letter of your sentiment.  This design took 11 rosettes.

6.  For this banner; the colored rosettes are staggered; one teal next to one black, then repeated.
Reverse the 4" scallop circles and adhere black to teal, then glue the teal to a black rosette.  Refer to the photo given for this step.

7.  Lay the rosettes flat, rotating the colors; one next to the other.  Remove the adhesive from the back of one 3" Joy letter and adhere it to the 4" scalloped circle on the first rosette.  Be sure to spell everything correctly!  Repeat for each letter.


8.  To hang the banner:  Lay one rosette with the letter facing up if you are reading it.  Flip the rosette over and adhere a 1" circle of cardstock where the hanger will go.  Make sure it is centered with the middle of the letter on the opposite side and will hang straight when you thread it onto the jute.  Apply the adhesive to the back of one hanger and adhere the hanger to the 1" circle as shown.  Make sure the hole in the hanger is in the right position....going the right direction.  Repeat for each rosette.


9.  Once step 8 is accomplished; measure the jute string for the length you will need and double.  Thread two strands of the 3-ply jute string through the eye of each hanger.  **Designer note:  If you do not have the hangers.....space your rosettes evenly; right side facing up and glue the string between the rosette and another cardstock circle on the back.  It will be important to make sure everything is hanging at the appropriate angle for all of the letters to be straight.

10.  Tie a loop in each end of the jute so you can hang the banner.

11.  To finish:  Cut the ribbons in 8" lengths.  Tie 4 ribbons between each word and at each end of the banner.  Now it is ready to decorate your party!

**Designer note:  You can reduce the size of your rosettes by cutting them in 2" strips instead of 3" strips.  You can also use 3 strips of the scored cardstock for each rosette.  This will make the rosette a little lighter in weight.


Make sure to follow Deflecto Crafts on Pinterest and Facebook for more inspiration!

Thank you for stopping by!  I love getting comments and questions.
Live Life with a Flourish!

Wednesday, July 13, 2016

Store and Display with Deflecto

I love making tags. They are great ways to try out new techniques. I will often refer to my tags when I am looking for inspiration.


An excellent way to store and display tags is to clasp them together using the Deflecto Pear Clips. I can easily sort through my finished tags and refer back to them when creating.


They also work great to attach to the Deflecto Flexible Pouches. These flexible pouches, along with the magnetic craft sheet work great for storing my stencils.


Make sure to follow Deflecto Crafts on Pinterest and Facebook for more inspiration!

Enjoy!

Wednesday, May 18, 2016

Easy DIY Sticky Notepad Holders With A How To Video

Hey, everyone! Have you ever had to come up with a last minute gift for someone?  These little Sticky Notepad Holders make great gifts, and they are quick and easy to make using Deflecto 3x4 mini frames and Flexible Sign Danglers.


Click on the picture below to watch the video.....


Make sure to follow Deflecto Crafts on Pinterest and on Facebook for more inspiration!


Supplies:

Deflecto 3x4 mini frames
Deflecto Flexible Sign Danglers
BoBunny Believe Paper
Tul Pens
Beacon 527
Post-It Notes

Thanks for stopping by and happy crafting!
Nadine

Friday, May 6, 2016

Graduation Dessert Stand w/Chibi Lights and Video Tutorial

My husband is about to graduate with his Masters in business and we are throwing him a party.  I have a friend that makes the prettiest cookies and I wanted a dessert stand to display them all.  I have been dying to decorate my Deflecto dessert stand, and I now have the perfect occasion to use it!!  


I went with a black and white theme on this stand, and just used the year of graduation as the topper.  Here is a full video tutorial on how I made the stand with the electrifying Chibitronic lights I added in on all three tiers and the top.


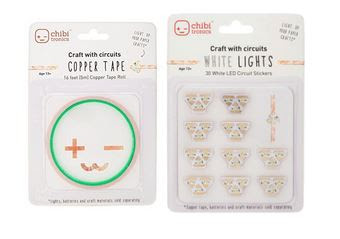
I used the 3 Tier Dessert stand and the VersaGrip Double Clip Sign Holders both from Deflecto and the Chibitronics lights and tape to make each flower and gems on top all light up.

http://chibitronics.com/

Here is a little video tutorial on how to use the Chibi Lights.


http://www.deflecto.com/craft/

Here are some up close shots of the stand.


Deflecto products are available through local art, craft, and educational stores, in addition to online retailers such as Amazon.com, Scrapbooking.com, and Scrapbooking Made Simple. To find a local retailer, click HERE and enter your zip code to see where you can purchase Deflecto Craft products near you.

Thanks for stopping by and checking out my fun dessert stand all lit up for graduation.

Supplies Used:
3 Tier Dessert Stand - Deflecto
VersaGrip Double-Clip Sign Holder - Deflecto
Light Kit - Chibitronics
Papers - DCWV
Flowers - Prima
Washi Tape - Scotch
Gems - Eyelet Outlet
Punch - EK Success
Circle Cutter - Kreaxtions
Alpha Stickers - American Crafts
Tape Runner - Scotch
Glue - Beacon
Enjoy!!

Monday, March 21, 2016

Burlap Easter Wreath with Video Tutorial

Erin, here today and I have always wanted to create a spring wreath, and I finally got around to doing it, and it came out so cute!! I really wanted to use up the scrapbook supplies I already had, to create something a little different something other than a traditional scrapbook layout. The wreath just seemed like the perfect thing to use them on.


I used the Sign & Banner Hangers on the back of the banner to hold it in place on the wreath.


Here is an in-depth video tutorial on how I made this super cute wreath.


Deflecto products are available through local art, craft and educational stores, in addition to online retailers such as Amazon.com, Scrapbooking.com and Scrapbooking Made Simple. To find a local retailer, click HERE and enter your zip code to see where you can purchase Deflecto Craft products near you.

Supplies Used

Sign & Banner Hangers - Deflecto
Metal Wreath Base
Fabric/Burlap - Canvas Corp Brands
Rope - Canvas Corp Brands
Mist - Tattered Angels
Chipboard - Bella Blvd
Bows - Bella Blvd
Paper - Bella Blvd
Stickers - Bella Blvd
Ink - Prima
Plastic Eggs
Glue - Beacon

Enjoy!

Wednesday, February 24, 2016

Endless Possibilities With Our Sign & Banner Hangers

Hello! Alicia, here again, today sharing a small but  very useful item; the Sign & Banner Hangers are perfect to hang banners for an office party or in your child's bedroom. The possibilities really are endless with these little hangers.


The Deflecto products used in this project can be purchased at Amazon.com, or you can click HERE and enter your zip code to see where you can purchase Deflecto Craft products near you.

Friday, February 19, 2016

Mini Heart Banner

I wanted to create a cute mini banner to hang up on my desk for the month of love (February). In my mind these cute little things do not have to come down right after Valentine's day, why not celebrate it a bit longer and enjoy the season!!


I cut out the rose leaves die on white cardstock, inked the edges and then drew in the lines with a black pen for the veins of the leaves. On the burlap banner, I stamped in black dye ink a swirl pattern stamp called to add a little something to each of the burlap pieces.


I cut out the heart die on white cardstock and then misted it with red mist. After it had dried, it traced out the heart shape and glued it to the back of the white cardstock to give it a backing. I used the same process on the Heart Clip Tree Video Tutorial. I traced the heart shape and Cupid with black ink, and then stamped and cut out the Love Arrow stamp and glued it onto the cupid as if he were shooting the love arrow.


On the back of each section of the banner, I placed the Deflecto Sign and Banner Hangars and ran the rope through the holes and then glued them in place. To hold up the banner, I just placed little tacks on the board and rested the banner into place. Making it easy to place wherever I want!!


The Deflecto products used in this project can be purchased at Amazon.com, or you can click HERE and enter your zip code to see where you can purchase Deflecto Craft products near you.


Little mini banners are cute to hang up in your workspace, on a wall, or window ledge. The possibilities are endless, have fun with it and be creative!!

Supplies Used:

Banner Hangars - Deflecto
Paper - Canvas Corp
Burlap Pieces - Canvas Corp
Rope - Canvas Corp
Dies - Die~Namites
Stamps - So Suzy
Ink - Prima
Mist - Tattered Angels
Flower - Maya Road
Pen - Tombow
Adhesive - Beacon & Xyron

Enjoy!

Tuesday, February 2, 2016

Adorable Heart Clip Tree With Process Video

I love February with the feeling of love in the air. Right now with my kids is a fun little month with cute cards and always lots of candy, but it does put a smile on my face. So here is a cute little tree to brighten up my house for the season.


I made the entire tree from scratch with wood, clips, paint, paper, and glue.  Here is a video tutorial on how I made this fun little tree.


This is actually round 2 of the same tree I made for Christmas/Winter. 

http://scraps-of-reflections.blogspot.com/2015/12/clip-tree-deflecto-ccb.html


I made this tree with the wonderful VersaGrip Double Clip Sign holders from Deflecto; they are the entire inspiration behind all this cuteness.

http://www.deflecto.com/products/pc/VersaGrip-Wide-Clip-Sign-Holder-184p1035.htm#.VqqRtFLdiUk

Here are some up close pictures of this cute little tree.


Products used can be purchased at Amazon.com, or you can click HERE and enter your zip code to see where you can purchase Deflecto Craft products near you.


Send some love to someone in your family, either with a hug, card, or just saying something nice.  It is truly what Valentine's Day is all about.  My hope is seeing this cute little tree in my front hall will remind the rest of my family and me to be a little kinder to each other!

Supplies Used
Wood - Dowel Rod and 2x4
Ink - Clearsnap
Pen - Sakura
Pearls - Kaisercraft
Adhesive - Xyron & Plaid
Enjoy!
Related Posts Plugin for WordPress, Blogger...