Showing posts with label Deflecto Stackable Caddy Organizer. Show all posts

Monday, February 8, 2021

Home Kitchen Pantry Organization

 Cleaning your pantry can be overwhelming, but we have you covered! Check out these simple steps to help get your pantry organized in no time. 


Empty Your Entire Pantry

Starting out with a clean slate can be very refreshing. Throw out expired foods or items that are not used frequently.


Categorize Like Items

Putting like items together will help you be able to find things quickly. Categorizing and subdividing will help maximize your efficiency. 


Use Clear Containers

Using clear containers is visually appealing by having an inspiring uniform tidiness. The Interlocking Stacking Organizer is perfect for pasta. The Stackable Cube Organizer can help keep your space clutter-free by storing small snacks or baking supplies. 


Kid-Friendly Space

Have an easy to reach area just for the kiddos. They can easily grab the snacks they want. A huge bonus is they won't have to ask you every time to get it. 


Utilize Every Space

Use a can rack organizer for canned drinks or canned foods. Shelf risers or spice racks help you see smaller jars and items. The door and wall can also be utilized with the Wall Mounting Bar paired with the Stackable Caddy Organizer or Tilt Bin Interlocking Storage Organizer would be perfect for small packets and snack packs. 


Label

Label all of your containers and storage bins. Using a label maker or sticker paper will make finding food and ingredients pleasant and easy.


Use Decorative Baskets & Bins

Decorative baskets or bins are perfect storage solutions for reusable bags, plastic wrap, or other kitchen necessities. It is a great way to hide storage bags that are hard to keep tidy. Use the Antimicrobial Jumbo Magainze File to hold all of these items and save space in your cabinets! Tip: Use sturdy boxes and dress them up in some wrapping paper, leftover wallpaper, or contact paper.


Family Help

Have everyone in the family keep up the good work. Show them where everything goes and take turns on maintaining it twice a month!

Monday, January 11, 2021

Tips for Getting Organized in the New Year


The New Year is the perfect opportunity for making resolutions, renewing your goals, and reorganizing your home. I like to start off each January with a deep clean and organization to set myself up for success for the new start. Here are my top 10 tips for getting organized in the New Year.

  1. Set Manageable Goals In order to stay organized, set manageable goals for yourself. Write down three things every morning that you can realistically accomplish. At the end of the day, you’ll feel more accomplished and encouraged to tackle all those little tasks.
  2. Get with the Flow When organizing your space, first declutter. A mess is necessary in order to get a good, organized flow of your area. Put most used items in easy to reach places or at eye level if it’s on a shelf. Things that aren’t used, frequently, put away in lower drawers, cabinets, shelves.
  3. Establish Daily, Weekly, and Monthly Routines -  As a busy mom and business owner, I know the importance of establishing a daily, weekly, and monthly routine. I need a clear, set routine to keep everything moving and in-order. In my office corner, I keep my daily, weekly, and monthly schedules separate. Visually, it can be overwhelming looking at my monthly calendar when I just need to know what to do just for that day, so I separate my schedules into different drawers using the Three-Drawer Organizer. That way I know exactly where and what I need for that exact moment. 
  4. Track Your Progress -  A big part of staying organized is tracking your progress for the whole family, especially for the kids. Create new and helpful habits for your little ones. I found a fun way to keep track of our progress by adding stickers to a chore chart. My daughter, Lily, loves to check off her chores with stickers. It makes keeping us organized fun and simple!
  5. Choose One Area at a Time -  Organizing can be overwhelming at times. Instead of having a large project to complete by a deadline, break it down into smaller, more manageable bites. Choose one area at a time to organize. I usually tell myself: “Today I’m going to organize my closet today.” That’s a manageable chore, instead of cleaning every single closet in my house.
  6. Find a Home for Everything - In the past, whenever me or my husband needed a nail, I used to dig through several buckets before I was able to find one. Now, I’ve started keeping all my tools, nails, and screws, perfectly organized in the garage. The Stackable Caddy Organizer Multi-Pack Bundle makes the perfect toolbox (and the rolling wheels base makes it so easy to move around to whatever project I need it for!). By finding a home for everything, I am able to simplify my life and make it less stressful. 
  7. Color Code I love color-coding. It’s so incredibly easy to get organized when everything is visually and aesthetically in order. My favorite way to do this is arranging it similar to a rainbow - white, red, orange, yellow, green, blue, indigo, violet, and black.
  8. Divide And Conquer -  Organizing is not for the faint of heart. We all need a little help to get and stay organized. That’s why I rely on my family to help me divide and conquer messy situations. Don’t be afraid to ask for a little help. When everyone pitches in, we all get the work done in time.
  9. Create New Storage Solutions If your current organization system isn’t working, it might be time to switch up your organization game. Don’t be afraid to be creative in making new storage solutions! I recently started using Tilt Bin® Interlocking Storage Organizer for my electronics. With the unique interlocking system, this organizer is perfect for keeping all my chargers, wires, and other electronic gear all in one place instead of all over the house.
  10. Set Reminders Set reminders on your calendar or phone to revisit the newly organized space to keep up the good habits. The secret to an organized home is to stay organized. By setting yourself periodic reminders, you maintain the function and order.
Now it’s time to celebrate your success in your newly organized space! The New Year is the perfect time to reinvent a new you. With these simple tips, you can achieve your organizational dreams. #DeflectoAtHome

Friday, October 30, 2020

DIY Thanksgiving Ribbon Turkey Decoration

Add a little fun and whimsy this Thanksgiving with this Quick and Easy Ribbon Turkey Decoration.

Featured Storage:  Deflecto Ribbon Dispenser and Deflecto Stackable Caddy Organizer

Materials Needed:

  • Felt Pieces:  Brown, Red, and Yellow
  • Assorted Ribbon
  • Googly Eyes
  • Scissors
  • Hot Glue Gun or Craft Glue
  • Clothespin
  • Cardstock
  • Permanent Marker
  • Ruler

Directions:
  • Draw a simple turkey body, beak, and wobbler on the cardstock to create a pattern.   
  • Or, you can download, print, and cut Design Team Member Beth Watson's turkey pattern here.
  • Trace pattern pieces onto the felt and cut out.  (Cut two turkey bodies)
  • Glue googly eyes, beak, and wobbler onto the turkey body.


  • Measure and cut six-inch lengths of rainbow-colored ribbon from your craft stash. Fold each piece of ribbon into a loop and secure at the ends with a glue gun and glue sticks. For each turkey, you will need 10-12 loops of ribbon.


  • Line up the loops in the color pattern that you prefer.  Attach each rainbow ribbon loop to the back piece of the turkey body with a glue gun and glue sticks. Measure and cut two lengths of yellow ribbon six inches long, tie a not near one end, and then cut out a triangle notch to resemble the turkey legs. Glue to the bottom of the body of the turkey.

  • Glue the front piece of the turkey onto the back, which will cover all of the ribbon ends. Attach a wooden spring-style clothespin to the back center of the turkey with a glue gun with the clip end pointing up.

Ribbon Turkey Decorations make Great Place Cards for your Thanksgiving Table.  

Cut a strip of cardstock 3/4″ in width, hand letter your name onto the strip with a Permanent Marker, and then clip into the clothespin. The wooden clothespin acts as a stand for the turkey to sit and a clip to hold the names as place cards.

The Ribbon Turkey Decoration was designed by Beth Watson.  
For more great projects visit Beth's blog here.


Share your projects and ideas using #DeflectoAtHome #DeflectoCrafts

Friday, September 11, 2020

Buffalo Plaid Wood Slice Pumpkin

How to Make a Buffalo Plaid Wood Slice Pumpkin

Nothing says "Warm and Cozy Fall" like Buffalo Plaid and Pumpkins.  

Add them together for a cute Fall Home Décor project.


Featured Storage:

Materials Used:

  • 7″-8″ Unfinished Round Wood Tree Slice
  • Acrylic Paint:  Orange Twist, Off White, Light Gray
  • 1″ Removable Painters Tape 
  • Paintbrush
  • Fine Grit Sandpaper or Extra Fine Grit Sanding Sponge
  • Hot Glue Gun
  • Small “Home” Wood Word
  • Raffia, Ribbon, Button, and Twine

Directions:

  • Paint the inside of the wood slice with orange acrylic paint. Leave the outer bark showing.

  • Add strips of painter’s tape onto the wood slice to make stripes.  Rub your finger over the tape to make sure that the tape is securely on the wood and has no gaps.
  • Paint inside the stripes with a thin coat of off white acrylic paint.  Be careful not to apply the paint too thick.   Only one thin coat of paint is needed.
  • Remove painter’s tape.
  • Allow paint to fully dry before continuing to the next step.

  • Rotate the frame 180° and apply the tape in the opposite direction. Make sure the tape is securely down.
  • Paint additional stripes with a light coat of light gray acrylic paint.

  • Remove the painter’s tape. Allow the paint to dry.
  • Lightly sand the wood slice. Sanding brings out the wood-grain and helps to hide any little imperfections.
  • Wipe with a clean cloth.

  • Cut a small 2″ piece from a tree branch to use for the stem.
  • I also used a “home” wood word picked up at the craft store for my pumpkin.
  • Hot glue the stem onto the top of the pumpkin.  Hot glue the word “Home” on the front of the pumpkin.

  • To give the Pumpkin a little extra support, I hot glued a small wood piece (cut from an old scrabble tray) to the back of the pumpkin.  Because the wood slice is not perfectly round, you may have to offset it a bit.
  • Tie raffia around the stem and hot glue a small button bow with faux fall berries onto the pumpkin
The Buffalo Plaid Wood Slice Pumpkin was created by Design Team Member Sue Eldred.
For more fun projects visit her Sue's blog here.


Share your projects and ideas with us using #DeflectoAtHome #DeflectoCrafts.

Wednesday, August 12, 2020

Fall Football and Fun

Easy DIY Football Themed Party Ideas

Fall is right around the corner, and with that comes Football Season.

Whether you’re watching the NFL or High School Football, a few simple snacks

are always welcomed by the fans.


To keep the decorating easy, use a few sheets of Football themed scrapbook paper. 

I used one of the 3″ x 4″ sections and attached it to the front of a small stackable caddy container (from the Deflecto Stackable Caddy Organizer) with repositionable tape to make a silverware holder.


The Deflecto 3-Tier Dessert Stand is the perfect tailgating companion. 

It is easy to put together and folds flat for compact storing and transporting.  Use football-themed washi tape or strips of cut paper and adhere it around the edges of the tiers for added fun.  (Make sure to use repositionable adhesive. )


Create a banner using colored cardstock and letter stickers in your favorite team colors.


Having everything in cups makes for easy grab and go snacking.


Now we’re ready for some Football!

Share your projects and ideas with us using #DeflectoAtHome #DeflectoCrafts

Monday, August 3, 2020

Foam Board Ice Cream Front Door Hanger

Lynn Lilly shows you how to make a DIY Ice Cream Front Door Hanger!

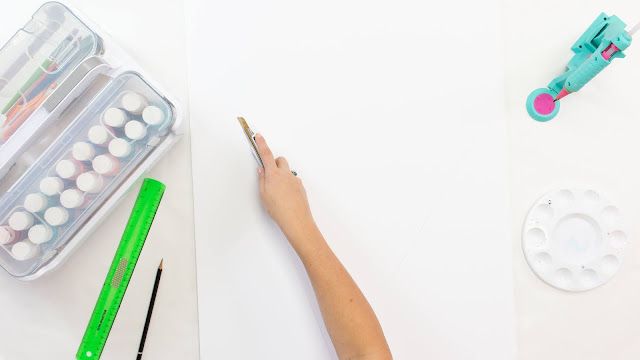
I love switching up my front door decor on the regular and I have been experimenting with creating front door hangers with foam board. A lot of die-cut front door hangers are made from wood but they can be pricey. So I thought why not give foam board a try and it has worked great and withstands weather! Whether you are an everyday crafter or someone who makes occasionally, it definitely helps to have your supplies organized. My go-to organizer for projects and long term storage is my DeflectoStackable Storage Caddy. It is great for general storage or if you are making a lot of the same type of project that uses the same materials like I have been with front door hangers it works great to dedicate a caddy with all the supplies.


Featured Storage Container: Deflecto Stackable Storage Caddy

Materials:

     18" x 24" Foam Board

     Pencil

     Ruler

     Box Cutter or Craft Knife

     Acrylic Paint and Brush

     Dimensional Puffy Paint

     Decoupage

     Hot Glue Gun & Glue or Industrial Glue

     Rope/Twine

Project Directions:

1. Draw the shape of a cone, ice cream scoop, and a cherry on the foam board.

2. Use the box cutter to cut out each piece.

3. Paint the cone brown acrylic paint and let it dry.


4. Once the cone is dry paint criss-cross cone lines in gold acrylic paint. Add texture with squiggly lines over the brown. Mix white into the original brown to create a light brown. Let the cone completely dry.

5. Paint the ice cream scoop pink. Let it dry. Next mix the pink with white to get a lighter pink and paint polka dots all over the ice cream scoop. Next, use the dimensional puffy paint to add sprinkles. Let it completely dry.

6. Paint the cherry red and the stem black. Let it dry. Once it is dry add some reflection lines to the cherry with white.

7. Glue the ice cream scoop to the cone and the cherry to the scoop.

8. Paint the entire piece with decoupage to weatherproof.

9. Glue a string to the back to hang it on the door.

TA-DA!!! You have your very own fun, front door hanger. You can take this same technique and make so many other shapes. I have already made a watermelon slice and a popsicle. The popsicle has been hanging on my door for weeks and withstood so many storms!

The best part about this project is that clean-up was so easy as I just popped all my supplies back in my Storage Caddy!

Share your projects and ideas with us using #DeflectoAtHome #DeflectoCrafts on social media.


Friday, July 10, 2020

DIY Beach Inspired Windchime


A Beach Inspired Windchime for those of us that LOVE the beach.
Here is a simple project to make that you can hang on the back porch to remind you of trips to the ocean.  It's a great way to use some of those shells you collected.

HOW TO MAKE A BEACH INSPIRED WIND CHIME.

Materials Used:  

  • Beach Seashells
  • Driftwood Stick or Stick from your yard
  • Wood Beads
  • Twine and Scissors
  • Acrylic Paint:  White, Light Blue, Aqua
  • Paint Brush
  • Fine Grit Sandpaper
  • Removable Painter’s Tape
  • DAP Rapid Fuse Adhesive 
Featured Storage:

Gather Your Supplies…
The Deflecto Caddy Storage Tray is so handy to use. It’s perfect for sorting the various sizes of wood beads used to make the windchime. And it fits perfectly into the large container of the Deflecto Stackable Caddy Organizer.  You can use the Deflecto Interlocking Marker Organizer in the caddy to hold paintbrushes.  You can put all your supplies in the caddy and take it outside and dream of being on the beach.
Faux Driftwood…
If you don't have an actual driftwood stick from the beach.  You can use a stick found in the yard and break it down to size.
  • Scrape the bark off the stick.  
  • Paint the stick with white acrylic paint and a couple of stripes of pale blue and aqua.
  • Give the stick a light sanding with fine-grit sandpaper to rough it up and make it look more natural.

  • Cut five pieces of twine approximately 24″ long.
  • Tie a knot on one end of the twine.
  • Wrap a small piece of blue removable painters tape on the other end of the twine to keep the twine from fraying.
  • String Wood Beads onto the twine.

  • Use a super-fast grab adhesive to glue the shells onto the end of the knots.

  • Tie beaded twine to the painted stick.
  • On the center of the stick, I glued a medium-sized Starfish purchased at a Beach Gift Shop.
  • Add a couple of beads to a piece of twine. Tie twine to each end of the stick to use as a hanger.
  • Stick the loose ends of the twine through the beads to hide.

The Beach Inspired Windchime was created by Design Team Member Sue Eldred,
for more fun projects from Sue you can visit Sue's Blog Here.


Share your projects and ideas with us using #DeflectoAtHome #DeflectoCrafts
Related Posts Plugin for WordPress, Blogger...