Showing posts with label Kids Crafts. Show all posts

Friday, October 16, 2020

Easy Sun Catcher Kids Craft


Easy Sun Catcher Kids Craft.

Keep the kids busy with a fun and easy craft with virtually no mess.

Featured Storage: Deflecto Caddy Storage Tray


Supplies Needed:

  • Black Die Cut Outlined Shapes
  • Variety of Colored Tissue Paper
  • Clear Contact Paper
  • Scissors

Directions:
  1. Cut tissue paper into small squares.
  2. Cut a piece of clear contact paper slightly bigger than the black outlined shapes.
  3. Place shape onto the clear contact paper.
  4. Randomly place tissue paper over the design until the entire design is covered.
  5. Cut around design with scissors.

The Stained Glass Tissue Paper Art was created by Design Team Member Erin Reed. For more fun projects from Erin you can visit her blog here.

               Share your projects and ideas using #DeflectoAtHome #DeflectoCrafts

Monday, August 3, 2020

Foam Board Ice Cream Front Door Hanger

Lynn Lilly shows you how to make a DIY Ice Cream Front Door Hanger!

I love switching up my front door decor on the regular and I have been experimenting with creating front door hangers with foam board. A lot of die-cut front door hangers are made from wood but they can be pricey. So I thought why not give foam board a try and it has worked great and withstands weather! Whether you are an everyday crafter or someone who makes occasionally, it definitely helps to have your supplies organized. My go-to organizer for projects and long term storage is my DeflectoStackable Storage Caddy. It is great for general storage or if you are making a lot of the same type of project that uses the same materials like I have been with front door hangers it works great to dedicate a caddy with all the supplies.


Featured Storage Container: Deflecto Stackable Storage Caddy

Materials:

●     18" x 24" Foam Board

●     Pencil

●     Ruler

●     Box Cutter or Craft Knife

●     Acrylic Paint and Brush

●     Dimensional Puffy Paint

●     Decoupage

●     Hot Glue Gun & Glue or Industrial Glue

●     Rope/Twine

Project Directions:

1. Draw the shape of a cone, ice cream scoop, and a cherry on the foam board.

2. Use the box cutter to cut out each piece.
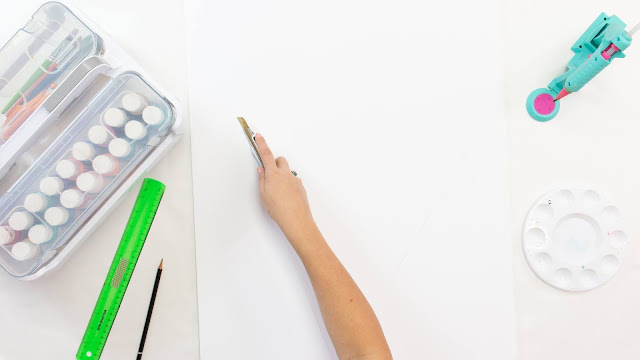
3. Paint the cone brown acrylic paint and let it dry.


4. Once the cone is dry paint criss-cross cone lines in gold acrylic paint. Add texture with squiggly lines over the brown. Mix white into the original brown to create a light brown. Let the cone completely dry.

5. Paint the ice cream scoop pink. Let it dry. Next mix the pink with white to get a lighter pink and paint polka dots all over the ice cream scoop. Next, use the dimensional puffy paint to add sprinkles. Let it completely dry.

6. Paint the cherry red and the stem black. Let it dry. Once it is dry add some reflection lines to the cherry with white.

7. Glue the ice cream scoop to the cone and the cherry to the scoop.

8. Paint the entire piece with decoupage to weatherproof.

9. Glue a string to the back to hang it on the door.

TA-DA!!! You have your very own fun, front door hanger. You can take this same technique and make so many other shapes. I have already made a watermelon slice and a popsicle. The popsicle has been hanging on my door for weeks and withstood so many storms!

The best part about this project is that clean-up was so easy as I just popped all my supplies back in my Storage Caddy!

Share your projects and ideas with us using #DeflectoAtHome #DeflectoCrafts on social media.


Thursday, July 16, 2020

Felt Craft Stick Apples


A Fun Fall Back to School Project to make with the Kids.

Materials Needed:
  • Craft Sticks
  • Felt: Red, Green, Yellow, Black, and Brown
  • School Glue
  • Scissors
  • Small Glass or Canning Ring
Featured Storage:

    Directions:

    • Trace and cut circles onto the red, green, and yellow felt using a small glass or canning ring.
    • Cut the felt circles in half and cut scallops on the inside edge.
    • Allow the kids to pick out the number of craft sticks they want for their apple, anywhere from 3-6 makes for great apples!
    • Glue apple parts to the craft sticks.
    • Cut black seeds, a brown stem, and green leaves from the felt.
    • Glue on seeds, stem and leaf to complete the apple.  


    The Apple Core Craft was created by Design Team Member Erin Reed,
    for more fun projects from Erin you can visit her blog here.


    Share your projects and ideas with us using #DeflectoAtHome #DeflectoCrafts

    Wednesday, June 17, 2020

    Making Pet Rocks


    Are you looking for projects to keep the kids busy this Summer?

    Making Pet Rocks is a fun and creative Summer project for kids of various ages.  
    There's not a lot of expensive materials needed.
    And, it's a great way to allow them to show their imagination.


    Materials Needed:
    • Smooth Rocks in a Variety of Sizes 
    • Acrylic Paint
    • Small Paintbrushes
    • Mod Podge Outdoor Sealer
    • Optional:  Googly Eyes

    The Deflecto Stackable Caddy Organizer makes the perfect Pet Rock Station.


    How to Make a Pet Rock:
    1. Gather up rocks from around the house.  Lots of different sizes, but not too big.  Take notice of marks and bumps that can be used for a mouth or nose.   
    2. Wash or wipe the rock to clean away any dust or dirt.
    3. Pick your paint colors and decide on your design.
    4. Get creative with faces and patterns.
    5.  If the rocks will be living outside, seal the rocks with a coat of Mod Podge Outdoor Sealer. 

    The Pet Rock Station was created by Design Team Member Nadine Carlier.  
    For more fun projects visit Nadine's blog here.


    Share your projects and ideas with us using #DeflectoAtHome #DeflectoCrafts

    Thursday, April 16, 2020

    No Mess Toddler Canvas Painting


    Working and crafting from home can be messy with kiddos. I know my little one loves to paint but she seems to get it everywhere but the canvas. I decided to create a mess-free way for my little artist to paint her own work of art! Neither one of us got a drop of paint on us during the whole set up and clean up process and we were left with a really fun piece of art to hang in her playroom.


    Materials:

    • Washable Kid Friendly Paint
    • Saran Wrap or Plastic Wrap
    • Painter’s Tape 
    • Canvas 

    Featured Storage Container: Deflecto Stackable Caddy

    I love my multiple Deflecto Stackable Caddies. The clear removable containers make it easy to find supplies and the handle is great to carry it from room to room. I have multiple caddies for storing everything from my daughter’s craft supplies to toys and even my personal art essentials. The lift and lock feature makes it easy to stack and store. You definitely can’t just have one!


    Project Directions:
    1. Cover the work surface with plastic wrap. 
    2. Place the canvas in the center of the plastic wrap. 
    3. Pour different colors of paint in piles on the canvas. 
    4. Cover the canvas with another piece of plastic wrap. Make sure the piece of saran wrap is large enough to cover the canvas and at least 6 inches around the canvas. 
    5. Tape around the top cover to the table and bottom cover to hold it in place. 
    6. Grab your little one and let their little hands go to town smooshing and spreading the paint around. My daughter had an absolute blast. 
    7. Once your child is done remove the plastic wrap from the top by lifting it straight up and discarding.
    8. Let the canvas dry. 
    TA-DA! Your kiddo has a mess-free work of art! This is probably one of the most relaxed stress-free crafts we have done in a long time! 


    Are you coming up with creative crafts for your kids or ways to get organized at home?

    Share your projects and ideas with us using #DeflectoAtHome #DeflectoCrafts

    Tuesday, April 14, 2020

    Art for Kids: Learning about Symmetry


    Having the kids home right now means that they require activities and stimulation for their creative minds.  Design team member Erin Reed gives us a simple project that you can do at home with your kids to help get the creative juices flowing for the whole family. 


    A wonderful way to help kids be creative is to use items found around the house to make a symmetrical pattern.  Symmetrical design is a radical line, like a snowflake.
    • Start with 6 x 6 inch squares of heavyweight cardstock paper.
    • Apply a thin line of glue to create a patterned design.
    • Use beads, sequins, gems, buttons, and other fun little bits to glue to the line.
    • A Deflecto Caddy Storage Tray is a great way to organize your small bits and pieces.


    For more art projects for kids you can visit Erin's Blog here.


    Create Store, Create More or #Cr8StoreCr8More for storage

    Monday, March 30, 2020

    Watercolor Coffee Filter Rainbows


    Keep the kiddos busy with this fun Rainbow Craft 
    from Design Team Member Beth Watson.

    Watercolor Coffee Filter Rainbows can be created with a few simple supplies that you probably already have around the house.

    Here's what you'll need to create Coffee Filter Rainbows:

    • Coffee Filters
    • Washable Markers
    • Craft Paper: White and Pink
    • Googly Eyes
    • Craft Glue
    • Gallon Size Zipper Bag or Metal Baking Sheet Pan
    • Water Spray Bottle
    • Scissors, Pencil, and Permanent Marker

    Directions:
    • Flatten round coffee filters and add colors in circles, in rainbow order, with the washable markers.
    • Place on a gallon size zipper bag or metal baking sheet pan and then mist with a water spray bottle. Watch the magic as the colors blend and swirl!  
    • Leave on the zipper bag and set aside to dry.
    • Once dry, fold coffee filters in half and cut along the fold with scissors.
    • You will create two rainbow shapes from each coffee filter.
    • Draw a cloud shape onto white craft paper and cut out with scissors. Attach cloud to rainbow with glue.
    • Draw two circular cheek shapes onto pink craft paper and cut out with scissors.
    • Assemble and glue the face on the cloud.  
    • Draw a smile on the face with a permanent marker.
    You can create Watercolor Coffee Filter Rainbows in 30 minutes with help from the kiddos. This activity teaches color theory and blending to make learning fun. Great to use as a suncatcher to brighten a door or window.  

    For more fun crafts from Beth you can visit her blog here.


    Create Store, Create More or #Cr8StoreCr8More for storage

    Thursday, March 26, 2020

    Easter Egg Bouquet for Kids


    Keeping the kids busy with this cute Easter Egg Bouquet Craft 
    from Design Team Member Erin Reed. 


    Here's what you'll need:
    • Plastic Easter Eggs
    • Pipe Cleaners 
    • Deflecto Tilt Bins  (to keep your supplies organized)
    • Small Mason Jar
    • Etching Crème 
    • Alcohol-Based Markers 

    Directions:
    • Pull the pipe cleaner (or chenille stem) through the openings of the egg bottom and twist. For more fun, add non-heavy items in the eggs. Place the second half on the egg.
    • Use several different colors of eggs to make the bouquet. Tip: You can also use different color stems.
    • Gather all the stems together for fun Spring Easter Egg Bouquet.

    To make the Vase:
    • Use etching crème to etch the outside of the mason jar.  
    • The etching crème roughs up the jar allowing the alcohol marker design to stick to the jar and not rub off.
    • Create designs on the jar using alcohol-based markers (watercolor markers will rub off.)

    Drop a few chocolates to the bottom of the vase and add the Easter Egg Bouquet.  


    For more details on Erin's project, you can read the full post here.

    Create Store, Create More or #Cr8StoreCr8More for storage
    Related Posts Plugin for WordPress, Blogger...
