Friday, March 30, 2018

Anybody Organized Challenged? Deflecto to the Rescue!


Spring is here!  Time to get organized!


I am building my storage over time.  Your personal storage can be built around your shelving or attached to the wall.  There are brackets to hang the multi-bin storage to give you more space.  My studio is full to the brim and it will take me time to get everything under control!  I love my Deflecto storage for getting my supplies organized!

For getting your Spring cleaning started you will need:
  • Deflecto Interlocking Multi-Bin Storage Organizer:  5 Bin Unit #20503CR; 6 Bin Unit #20603CR
  • Deflecto Sign Tags with chalk pen #899112RT
  • Washi Tape:  black and white, 1" wide
  • Scissors    

Before

1.  Unwrap the interlocking bins.  Follow the instructions and attach one bin to the other.

2.  Use a white label that comes with the bins to create the black labels that can be written on with the chalk pen.  How?  Measure and mark on one black sign tag the size of tag you will need.  Cut out using a sturdy craft scissor.  Slide into the slot on the front of the bin.  Use the chalk pen to write on the black label that you made.  Repeat for each bin. *Note:  Look closely at the bottom photos and you can see my chalkboard labels.  I haven't written on them yet.

3.  Apply the washi tape in rows to the white top surface of the top unit.  Refer to the photo given below and apply tape to the ridge at the top of each bin.  Fold under or trim excess tape.

4.  Repeat for the bins on the bottom row of storage.  

After


You can find Deflecto products at Amazon and at most major craft stores.

Happy Organizing!


Spring Flower Box

pencil holder
I don't know about you, but I absolutely love spring. Fresh blooming flowers are just about one of my favorite things. To help bring that spring feeling into my studio I made a box of spring flowers to keep on my desk using a Deflecto Stackable Cube Organizer.  

iron on letters
I used some pattern paper that I had on hand I inked the edges of all the papers using VersaMagic ink. I added some layers on the front piece and used my sewing machine to adhere everything together. I love using my sewing machine on my paper projects! These super cute letters are Joy Iron on Embroidered Letters - they are made for use on fabric but I use them on all sorts of projects including paper.
 
floral foam
Add some floral foam inside the cube. This piece has been up cycled from a floral arrangement the hubs brought me a few months ago. I am not a hoarder- I swear I am not. 
 
Fabric  flowers
 To make the flowers I used hot glue to adhere craft sticks to the backs of fabric flowers. I used single layered flowers and put several together to make these. Any flowers you have on hand would work. 
 
flower bucket
Adhere the papers to all sides of the cube. Cover the floral foam with paper crinkles (the Dollar Tree is a cheap place to pick these up!) and insert your flowers into the foam. Add a ribbon to the cube and you are done! I am also going to decorate some pencils and add to the cube - I think those would be so cute!
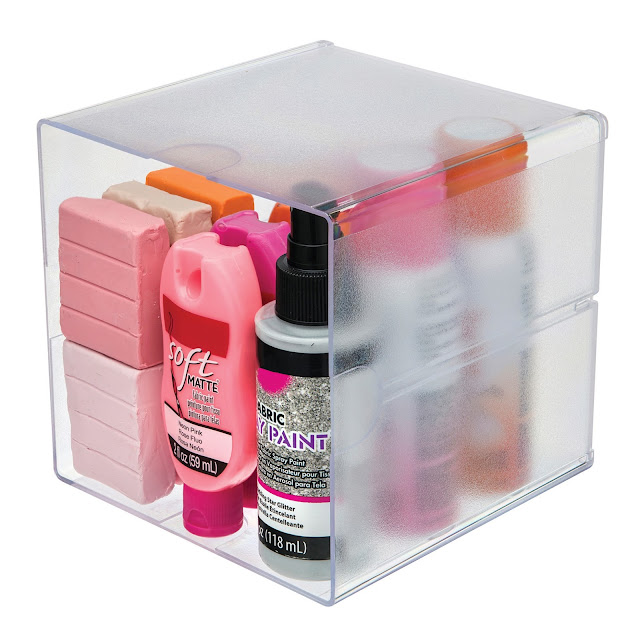
Deflecto cube
The Open Stackable Cube Organizer is a fabulous addition to your craft room and can be used for so many things! If you have more than one they clip together on the sides so they are secure on your shelf. Check them out here.  

How to make a Mini Flip Album


This cute little flip album is one of the “make and take” projects taught
in the Deflecto Craft Solutions Booth at Creativation in January.

Mini Flip Album Supplies Used…           
  • Deflecto 4″ x 6″ Clear Craft Frame
  • Scrapbook Paper-Jen Hadfield Collection (Pebbles Inc.)
  • 4″ x 6″ Cardstock- Kraft, Black
  • 3 3/4″ x 5 3/4″ Corrugated Kraft Cardstock
  • 3/4″ Silver Book Rings
  • 15″ of 5/8″ Antique White Double Face Satin Craft Ribbon
  • Drill
  • 1/8 Inch Hole Punch
  • Tape Runner

How to make a Mini Flip Album:
  1. Make two marks on the top of the frame approximately 3/4″ in on each side.  The marks need to be approx. 1/2″ down from the top of the frame.  (If the holes go down too far the pages won’t flip correctly.)  Drill two holes in the top of the frame with a 3/16″ drill bit.
  2. For the mini album cover…Adhere a 3/4″ x 4 3/4″ scrapbook paper strip onto the top of the corrugated paper leaving a 1/8″ margin on the top.  Adhere the 3″ x 4″ journaling card (cut from the scrapbook paper) onto a 3 1/2″ x 4 1/2″ piece of blue scrapbook paper layer, add those layers onto the corrugated paper and then onto a 4″ x 6″ black cardstock layer.
  3. Using the drilled holes on the craft frame as a guide, mark the cover and the Kraft cardstock pages and punch two holes on the top.
  4. Mark and punch holes into a piece of 4″ x 6″ decorative scrapbook paper and insert into frame.
  5. Attach cover and pages to the craft frame with book rings.
  6. Tie ivory ribbon around cover.

Friday, March 16, 2018

New Sewing Organizer On My Craft Table

Hello everyone!!!  Kymona from Kreative Kymona here today to share how I used Deflecto's Interlocking Single Tilt Bin - 4 Pack on my new sewing table.

Let's Take a Look:


I recently started sewing and I must say I love it. So, you know with a new craft comes a lot of new must have products.  

I've collected all of Dritz buttons, grommets, snaps, tools and much more for the bags I've learned to sew. These small pieces were kept in bags and bins that I can't just see. So, what have I done?  Bought more of the same items because I didn't remember what I already had in my stash.

So this amazing Interlocking Single Tilt Bin come in super handy for the dilemma I'm facing.

It sits right on top of my new sewing desk. I'm able to see into each bin and see what I have and what I need for my sewing projects.

Let me share why I love these bins:

1. The front is clear.
2. You can stack them on top of each other or side by side.
3. They are portable.
4. You can mount them on the wall or leave them on a desk.
5. The clear bins can be removed for cleaning.
6. Each bin is 4-3/4" W x 5-1/2" H x 4-7/8" D

My new sewing experience will be easier this year.  All of my important supplies all in one place.

So what do you think? How will you organize your crafting supplies? I would love to hear from you.

 Thanks for stopping by, I hope you were inspired here today.

~Kymona

Make sure to follow us on PinterestFacebook, and Instagram for more inspiration!
Don't forget you can purchase the Stackable Caddy at Target and Hobby Lobby!

Tuesday, March 13, 2018

Deflecto Makes Me Happy!

Hi everyone!

Today I want to share Deflecto's Interlocking Tilt Bin Storage Organizer. I am using these tilt bins for those little things we crafters need at arm's reach.  These bins are the perfect storage for the small space I have on the top of my crafty desk.  I love that they are clear and I am able to see what is exactly in them.  

As you can see in the picture below I have stacked them vertically but you can stack or connect horizontally also. You can also set on a desk like I did or use on a table, mount directly to a wall or hang on mountain bar. 


These clear bins tilt out effortlessly and stay open when in use; 


and remove for easy cleaning and refilling.


The sizes of these bins are: 4 3/4"W x 5 1/2"H x 4 7/8"D

All these options for storage is exactly what I need to keep me tidy and ready to craft. 
I can honestly say Deflecto is helping me keep my craft room so organized and happy. 

You can find them here:  
Scrapbook.com, and Target Online.


Thank you for stopping by! Till next time,

Rosie

Friday, March 9, 2018

How to Decorate Deflecto's Pink Frame

Hello everyone!!!  Kymona from Kreative Kymona here today to share how to decorate Deflecto's Pink Frame with Vinyl.

Let's Take a Look:


This pink frame is perfect to hold reminder signs that you could see every day.  Positive reinforcements are powerful when you are able to see and/or hear them every day.

This sentiment is perfect because we all could spread more love.

Here's how I created this frame:

I cut a piece of Stampin UP! Painted With Love DSP to 8.5 by 11 and inserted into the back of the frame so that you could see the pretty foil design.

I used the Cricut Maker and Cricut Design Space to create Cricut's Midnight Vinyl design that is on the outside of the frame.

Once the vinyl is cut, use Cricut's New Transfer Tape and Cricut's Scraper to adhere the sentiment and image as one piece to the front of the frame.

Nice and easy!!

So what do you think? How will you organize your back to school supplies? I would love to hear from you.

 Thanks for stopping by, I hope you were inspired here today.

~Kymona

Make sure to follow us on PinterestFacebook, and Instagram for more inspiration!
Don't forget you can purchase the Stackable Caddy HERE at Target.

Tuesday, March 6, 2018

St. Patricks Day Center Piece using the Open Deflecto Stackable Organizer

Hi everyone, it's Josefine, and I'm really excited about today's post. If you've seen any of my earlier posts, you know that I love mixed media projects. This time I went in a slightly different direction. I used the Deflecto Stackable Cube Organizer as a vase.


Green is one of my favorite colors, so St. Patricks Day is the perfect holiday for me :) I found some great fake flowers in my craft store and decided to use it as a centerpiece for my dining table. I wanted the flowers and the big clover to stay in place inside the cube, so I decided to go with foam cubes. I cut those in shape, rather loosely, but tight enough that nothing was wiggling around.

Before pressing the foam into the cube, I wrapped it with green, glittery ribbon.


Now I cut the fake flowers down and pressed them into the foam till the entire area was covered.


At the end I sprinkled a few gold coins all over the flowers and around the vase/ Stackable Cube.


Thanks so much for stopping by. I hope you enjoyed my idea for a St. Patricks Day centerpiece and don't forget to come back later to get even more inspirations. Josefine

Saturday, March 3, 2018

Deflecto Designer Spotlight for February 2018


Congratulations to the Deflecto Designers whose blog posts have been chosen for the
month of February. Check out their projects and instructions on the links given below!


Josefine Fouarge project:


Marilyn Gossett project:

Make sure to follow us on Facebook and Pinterest for all of our design teams inspiration.

Friday, March 2, 2018

Easy Ribbon and Twine Organization Tutorial

All those ribbon and twine can be difficult to stay organized if your supply is rather large. By using the interlocking tilt bins and adorable labels, you can keep all your ribbon and twine tidy and organized!


Materials
  • Deflecto Interlocking Single Tilt Bins
  • Spellbinders Die Cutting Machine
  • Spellbinders Die Cuts
  • Xyron Creative Station with Repositionable Refill
  • TomBow Dual Tip Pens
  • Colored Paper
Tutorial

Step One

Cut out the labeles using the die cutting machine and die cuts. Use two different sizes to get a layer effect for the label.


Step Two

Adhere to two sizes together using the Xyron Creative Station by turning the smaller size into a sticker.

Step Three

Write on each label using the TomBow pens. I matched each pen with the colored paper.


Step Four

Run the label through the Creative Station again.  Adhere the labels onto the interlocking tilt bins.

Step Five

Fill the tilt bins with supplies.

Step Six

Hang using the wall mounting bar for more storage options!


Now you have an easy way to keep your ribbons and twines tidy and stored beautifully! If you have a lot, you might want to group by color. Each tilt bin should hold a different color. This would make it easy to find the perfect ribbon for each project!!

Thursday, March 1, 2018

Deflecto for St. Patty's Decor

It is hard to get by St. Patty's Day without getting at least a pinch!  It is an often overlooked opportunity to create some fun!  I enjoy having a special dinner for the family or a party style lunch for my friends.  Deflecto products offer endless possibilities for decorating for any event or holiday.  Read on and I will tell you about my ideas.


Materials:

Deflecto:  Stackable Storage Cube, Standard, 6" x 6" x 6" #350401CR; Supergrip Sign Holder #20002CR; Clear Frame, 4" x 6" #597501CR
Cardstock:  white, green, black, Kraft
Vinyl adhesive film:  apple green, polished metal, 12" sheet
Die Cut Machine
Die or punch:  heart, 1", 2"
6" green scalloped circle
3" kraft scalloped circles
2-3/4" x 3-1/4"prints with a St. Patty's Day saying (I found a print on the internet)
3" x 3-1/2" rectangle of green cardstock (for border)
St. Patty's Day sign print-out; 4" x 6"
Rhinestones
Plastic gold coins
Anything else to make your party a success!


Directions:

1.  Find a St. Patty's print on the internet, size it to 4" x 6" and print out on white cardstock.  Trim excess paper and slide between the panels of the frame.  Cut a 6" scalloped circle and set/adhere the frame to the circle.

2.  Vinyl:  Cut out 1" hearts.  You will need four hearts for each clover.  Save scraps to cut the stems from.  Peel the release paper from the back of one vinyl heart and adhere to the frame.  Repeat with three more hearts to complete each clover.  Cut a stem from a scrap and adhere it to the clover as shown.  Make sure to place them exactly where you want them.


3.  Center and adhere the printed saying to the slightly larger green rectangle to create a border. Place the rectangle into the sign holder. 

4.  Cut out 3" scalloped circles from Kraft paper.  Remove the release paper from the sign holder, center and adhere to one Kraft circle.  Repeat for how-ever many you are making.


5.  Cut more hearts from the green vinyl, slightly larger or smaller for each clover, depending on the size you want it to be.  Adhere "clovers" to the Cube Organizer as shown.  Adhere a rhinestone to the center of each clover.

6. Bonus idea:   I used the vinyl hearts to decorate small Kraft paper bags with clovers.  I create 3-D paper decorations and I made the leprechauns to use as bag closures.  I sell these in my Etsy shop at PriMarilynly Paper.

Add some festive tableware and some good food and all you need is something green to drink and lots of good company!  I hope you found some inspiration here today and enjoy St. Patty's Day!

Make sure to take the time to enjoy the small blessings along the way and,

Live Life with a Flourish!

Marilyn


Wednesday, February 28, 2018

Rotating Carousel Organizer


Hello, Sue here today! Being a paper crafter at heart, I sometimes wonder…

What’s your favorite way to embellish?
For me it’s flowers, twine, buttons and pearls.


My Rotating Carousel Organizer is a great way to organize my “go to” embellishments. 
And... it looks pretty too.


The Deflecto Rotating Carousel Organizer with Nine Canisters comes with three 6″ bins and six 3″ bins.


It is also available as a Rotating Carousel Organizer with Six 6″ Canisters.
It’s a great way to organize your supplies.

Related Posts Plugin for WordPress, Blogger...