
Thanksgiving is just around the corner, and Deflecto has a product to help with any and every aspect of your holiday entertaining. I used Mini Slanted Sign Holders and Flexible Sign Danglers to complete my beautiful signage created for my Thanksgiving dinner.

Sometimes it isn't what you see; but what you DON'T see that makes something great! The first rule of craft designing is not to let the mechanics that are holding a design together, show! I created my paper pumpkins and flowers using my electronic die-cut machine. I stamped the sentiment on the front of the pumpkin with a rubber stamp that I like. Here is what you will need:
Materials:
Cardstock: Terracotta, Orange, Red, Green, Yellow (Fall colors); White
Inkpads: Coordinating colors to cardstock
Sponge Applicator
Die-cut Machine
Dies: Pumpkin, Maple Leaf, Flowers
Rubber Stamp: Blessed
Adhesives: 3-D Foam Dots, Tacky Glue
Computer and printer
Paper Trimmer
Instructions:
1. Refer to the photos given. Cut out the pumpkins (these are 4" wide x 3-1/2" high). This will apply to whatever shape you cut out as your main shape. The maple leaf is 4-1/2" wide x 5-1/2" high.
2. Cut out the flowers. The largest flower is 2" wide assembled, and the smallest is 1". I used a die cut on the electronic machine. For this step, you could substitute mulberry or silk flowers purchased at the craft store.
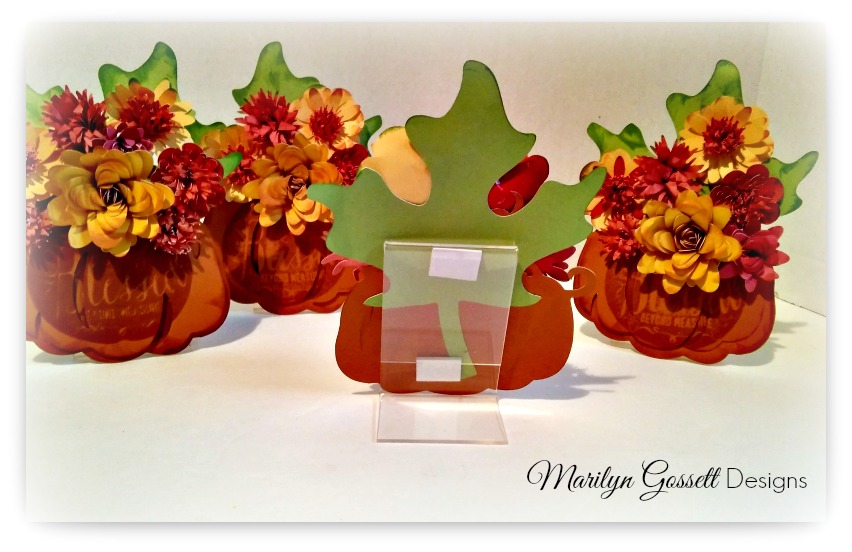
3. Adhere the leaf to the back side of the pumpkin with the top half of the leaf extending above the top of the pumpkin. Arrange and adhere the flowers to the pumpkin as shown.
4. Adhere the finished pumpkin to the front of the mini sign holder using 3-D adhesive. Refer to the back view given in the photo above.

5. Sign Dangler: Bend one end of the sign dangler, so the adhesive is facing down. Remove the release paper and adhere to the base of the mini sign holder. Leave the other end straight with the adhesive pointing toward the back of the pumpkin.
6. Print and cut out a 3" square sign. I like to use the free program PicMonkey.com to make my signage.
Remove the release paper on the end of the sign dangler and adhere the wrong side of the paper sign.
Voila! Now you can make as many of these as you like as food identifying signs, place cards, etc. You don't see the magic, but it is there! I used these four as food identifiers for my meal.

Thank you for stopping by the blog. I always appreciate questions or comments in the area below. I hope you got some inspiration here today and are enjoying the wonders of Fall!
Make sure to take time to enjoy the small blessings along the way, and
Live Life with a Flourish!
Marilyn


These are so cute awesome
ReplyDelete