Showing posts with label Stackable Cube Organizers. Show all posts

Monday, August 17, 2020

Autumn Shaker Card

If you love Fall and Cardmaking as much as we do, we thought you'd enjoy 
this lovely Autumn Shaker Card by Design Team Member Nadine Carlier.


Nadine's Autumn Shaker Card uses beads, glitter and a lot of various embellishments all conveniently stored in her Deflecto 4-Drawer Stackable Cube Organizer.  

The Stackable Cube Organizers are available with a variety of options to create the perfect storage solution for your craft room or office.  They help keep your workspace clutter-free and your supplies close at hand.


You can read more about the Autumn Shaker Card on Nadine's blog here.

Share your projects and ideas with us using #DeflectoAtHome #DeflectoCrafts on social media.

Friday, March 30, 2018

Spring Flower Box

pencil holder
I don't know about you, but I absolutely love spring. Fresh blooming flowers are just about one of my favorite things. To help bring that spring feeling into my studio I made a box of spring flowers to keep on my desk using a Deflecto Stackable Cube Organizer.  

iron on letters
I used some pattern paper that I had on hand I inked the edges of all the papers using VersaMagic ink. I added some layers on the front piece and used my sewing machine to adhere everything together. I love using my sewing machine on my paper projects! These super cute letters are Joy Iron on Embroidered Letters - they are made for use on fabric but I use them on all sorts of projects including paper.
 
floral foam
Add some floral foam inside the cube. This piece has been up cycled from a floral arrangement the hubs brought me a few months ago. I am not a hoarder- I swear I am not. 
 
Fabric  flowers
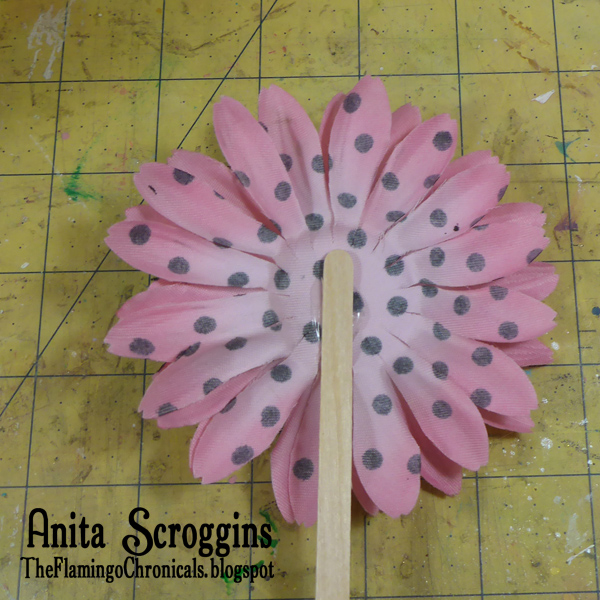
 To make the flowers I used hot glue to adhere craft sticks to the backs of fabric flowers. I used single layered flowers and put several together to make these. Any flowers you have on hand would work. 
 
flower bucket
Adhere the papers to all sides of the cube. Cover the floral foam with paper crinkles (the Dollar Tree is a cheap place to pick these up!) and insert your flowers into the foam. Add a ribbon to the cube and you are done! I am also going to decorate some pencils and add to the cube - I think those would be so cute!
Deflecto cube
The Open Stackable Cube Organizer is a fabulous addition to your craft room and can be used for so many things! If you have more than one they clip together on the sides so they are secure on your shelf. Check them out here.  

Tuesday, March 6, 2018

St. Patricks Day Center Piece using the Open Deflecto Stackable Organizer

Hi everyone, it's Josefine, and I'm really excited about today's post. If you've seen any of my earlier posts, you know that I love mixed media projects. This time I went in a slightly different direction. I used the Deflecto Stackable Cube Organizer as a vase.


Green is one of my favorite colors, so St. Patricks Day is the perfect holiday for me :) I found some great fake flowers in my craft store and decided to use it as a centerpiece for my dining table. I wanted the flowers and the big clover to stay in place inside the cube, so I decided to go with foam cubes. I cut those in shape, rather loosely, but tight enough that nothing was wiggling around.

Before pressing the foam into the cube, I wrapped it with green, glittery ribbon.


Now I cut the fake flowers down and pressed them into the foam till the entire area was covered.


At the end I sprinkled a few gold coins all over the flowers and around the vase/ Stackable Cube.


Thanks so much for stopping by. I hope you enjoyed my idea for a St. Patricks Day centerpiece and don't forget to come back later to get even more inspirations. Josefine

Tuesday, January 16, 2018

De-cluttering for the New Year with Deflecto!

Happy New Year!  Wishing us all a wonderful and blessed New Year!  May all your dreams come true for 2018!  Would you like to know my dream for the new year?  It is actually the same one that I have every year!  I dream of having my studio completely cleaned up and organized as well as the rest of my house! 

I think fighting clutter is high on the list for most of us.  By the time Christmas is over, I can barely get to my desk in the studio! There are boxes and clutter everywhere!  Since I love to work in this room without the clutter, I have decided to take it in hand and attempt to start fresh for this year.

I am taking some pictures of where I am now, and the great products I have to help me get organized.

This is a picture of a portion of the studio as I walk through the door.  I have actually been sorting through things and eliminated a lot of boxes, but still, have a long way to go.  I will post another blog once I work my way through all of this and show you how it turned out!


In the photo below I am showing a bookshelf that is filled with some of my Deflecto storage.  I have various sizes of tilt out interlocking multi-bin storage organizer that fit together for storing smaller things like flowers, embellishments, hardware, etc. I am going to empty everything and make it more efficient as I have a tendency to put things out of sight without giving it much thought.  Sound familiar?  


The tilt-out bins can be removed which allows for 2 different modes of storage.  The tilt bin can be used to hold pens as you can see on the upper shelf to the left.  Right below that is a newer product made especially for holding pens.  These interlock and you can add as many as you like.  They can be stood upright or put on their sides as shown.  These also fit nicely into the new caddy storage that is very popular with crafters and makers.  Here is another view below.  On the top of the shelf are more Deflecto storage products that I have used for various purposes.


The photo below features one of my favorite products from Deflecto.  These are interlocking 4-bin units that can be taken apart and used as a single compartment.  I have added knobs to the front of some of the bins; others I made into a candy bin with knobs decorating the top.  Right now, I have them all interlocked into a unit and I need to organize everything that is in the bins.  I love these!  They are fun and easy to alter if you like to personalize your decor.  You can separate the bins and use them as gifts, personalizing them for the recipient.


The next photo shown is a close-up of my favorite bins.  If you look close at the lower left hand quad, you will see the clear acrylic knobs that I attached to the bins.  I love the way these look!  You can purchase 1 bin at a time, or purchase them in a package of 4.

If you share my pain with clutter, leave me a message if you have any organizing tips that work well for you!  

I will be back with an update on my de-clutter!  Leave me a comment if you have any special tips!  My special tip is donate, donate, donate! Lol!

Cheers!

Marilyn

Friday, January 12, 2018

Organizing Is Also Part Of My Hobby

If I am not crafting I am organizing my craft supplies and believe me, I enjoy it as much.  Although organizing is an all year process, for some reason the beginning of the new year its always more motivating to do it.

I have taken lots of photos to share with you on how Deflecto products help me stay organized.

First, I like to display positive inspiration every so often. I need it as a constant reminder of the great things in the world. The Deflecto frame if perfect to interchange slides of positive quotes. So I keep it like this close to my desk.

8 1/2"x11"  - Black Craft Frame. See here: Craft Frame


On my desk I also keep the Deflecto Marker Organizer. It helps me keep my tools, markers and other useful items at arm's reach.

Next, also at my desk I use the Stackable Cube Organizer "X" Divider and Stackable Cube Organizer Open to help me store my markers. I can take out easily and put back in place. I will soon invest in more of these cubes to store my complete collection of markers with the cubes.


On the opposite side I also keep more cubes for my color pencils and more markers.
 

Next to my markers I also have the Deflecto Stackable Cube Organizer 2 Drawer
It fits perfectly on my desk holding many of my daily used items.
 
Another great item I use to organize my many metal dies is the Craft-Magnetic-Sheets. I love that they come 10 in a pack, plenty for our big collection of dies right?


I easily cut them to size and then organize my dies by brand and put in 
wood boxes as seen on the pic below.


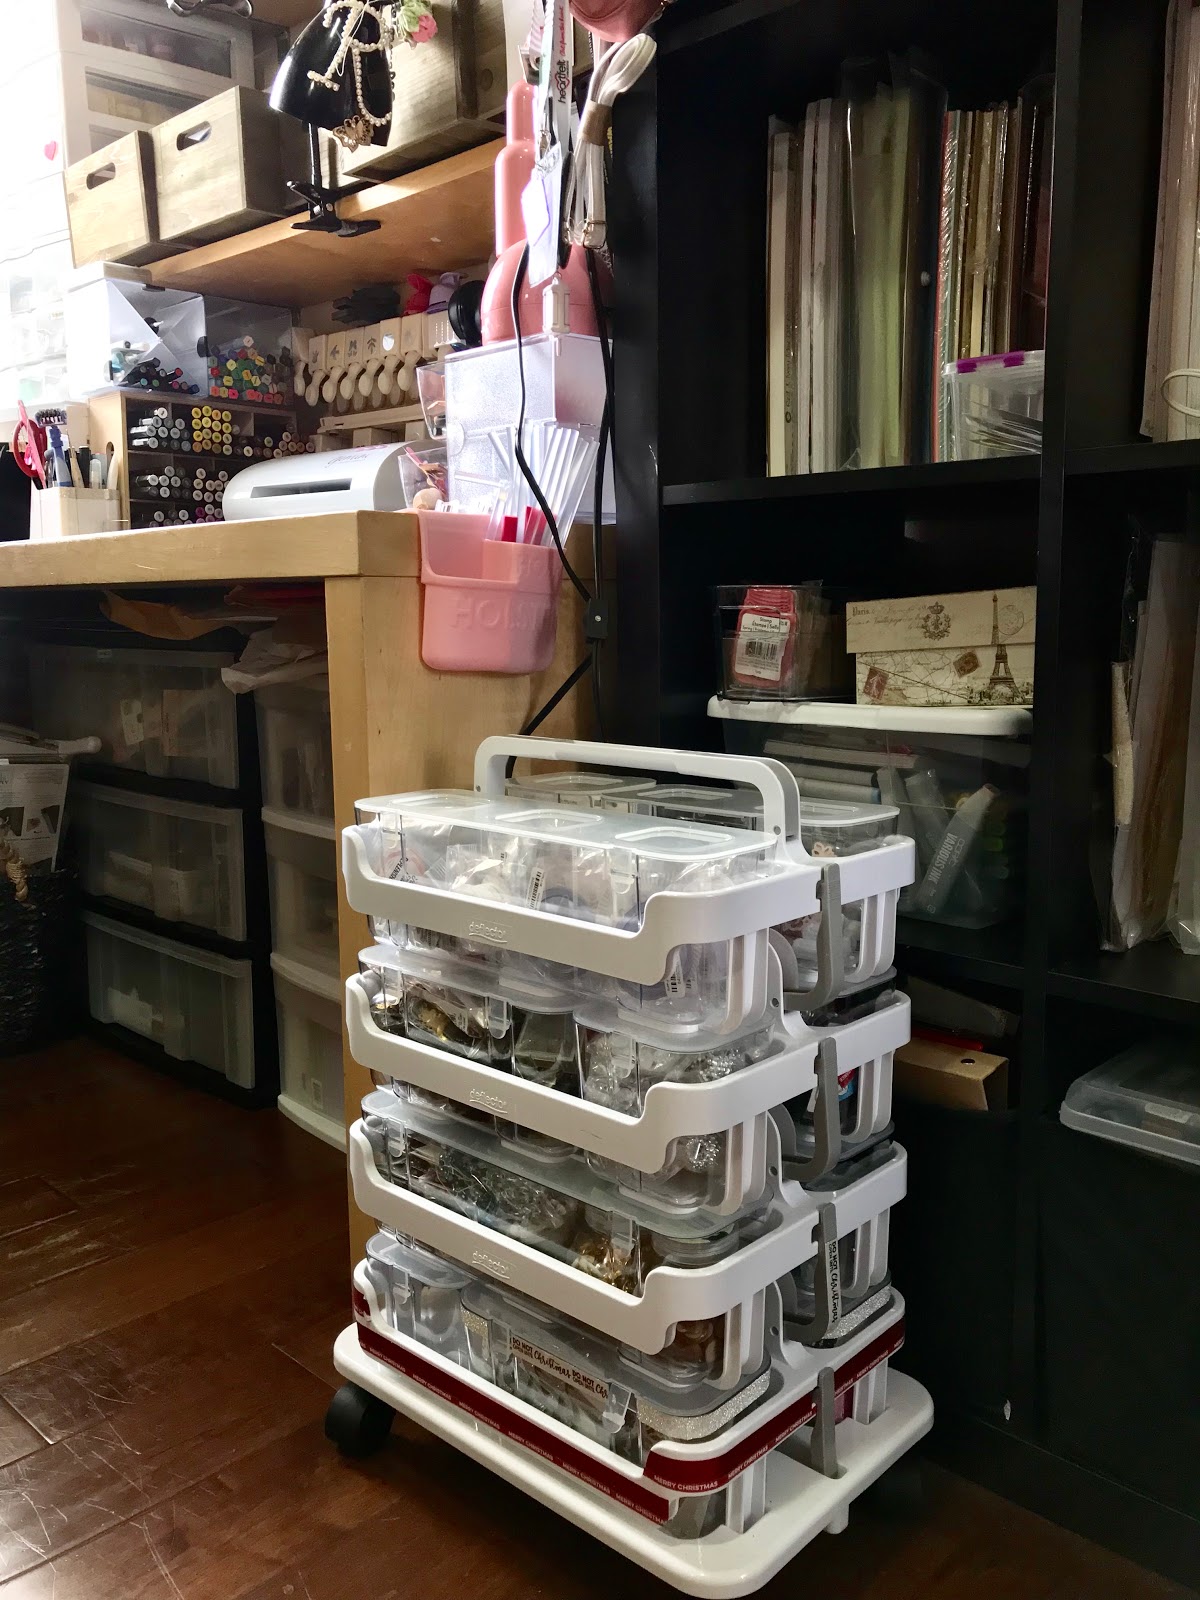
Without a doubt the Stackable Caddy Organizer has been one of my all time favs. It can hold so much and best of all I can trasport it anywhere I want. All you have to do is attach the Deflecto Wheel Base and it moves freely. You can also add as many caddies as you wish.


And last but not least, I have the Craft Tilt Bin. It has amazing features, you can:
  • Mix and match to create your ideal storage system
  • Interlocking, dovetail design allows you to stack and connect units together to form a custom modular system
  • Clear bins tilt out effortlessly and stay open while in use; remove easily for cleaning and refilling
  • Great for craft and scrapbooking storage, sewing supplies, and more.  
  • Can be wall mounted or used on tabletop


As you can see Deflecto has many organizing options. I am sure you will find one that fits your needs.

The products I have used here you can find at: Scrapbook.com, Target, and Hobby Lobby. I have no doubt they will make your crafty life easier and funner. You can always contact me for any additional questions. 

So till next time.... I leave you with the "Big Picture" of my Crafty Organized Corner.


Best Wishes for 2018!

Rosie 

Friday, January 5, 2018

Time to Get Organized - My Favorite Tips

Are you crazy about organization like I am? I simply cannot create unless everything in my studio is in its proper place. Deflecto products are simply great at helping me keep everything in order and where it belongs. Here are my favorite products and tips for getting your craft space organized.


Craft Tilt Bins™ are one of the best ways to help keep order. You can fill a wall with them -and store more than you can imagine. Here I have organized paints, mediums, brushes, and inks all in one place. I have removed some of the actual bins to better store my smaller bottles of paint.


Everything in this bin went into the Craft Tilt Bins™ above. Everything is so much easier to see, get to, and work with now.


I also have a set of the Interlocking Stacking Tower Organizers on top of the bins. Remember their lids store safely on the bottom of each piece so they never get lost! I have assorted brushes, pens, and other odd size things in them that I use regularly.


Stackable Cube Organizers are great for storing things that are a little taller. Here I have my set of Tombow Dual Brush Markers (which are TALL) in one of the "X" bins. I also store washi tape and small Xyron machines in this set. These cubes easily attach on the sides so that they are stable on your shelf or table.


More Cube Organizers and Interlocking Stacking Tower pieces keep my stationary and smaller bits and pieces corralled and neat. Use a fancy punch and cardstock to add labels to the front of your drawers so you can see what is in each one. 


The Rotating Organizer was a real life saver to clean up the clutter on my desk. I had multiple small buckets that took up a lot of room. By removing the tops from the bins I am able to store my most used supplies right on my desk in very little space. The very best thing - it SPINS! So I can easily reach whatever I want quickly.


I store my adhesives, pens, additional brushes, my camera all in one small spot. I toss odd and end embellishments in two of the bins. Those little bits that are left from a package of embellishments go in here so they are front and center; I am able to use them up without forgetting about them in a drawer.


Hands down my favorite piece are the Stackable Caddy Organizer. Y'all --- I LOVE these things. Seriously. Go get yourself some right now. I'll wait. ..... Are you back?  These caddies are AMAZING. Here you can see my Interlocking Marker Organizers in the top caddy. I love these because they have flexible grids inside that hold markers and pens in a variety of sizes.

Do you go away to crops? These are great for travel. You can fill them up,, stack them up, head off to crop, and be prepared to beat people off with a stick. I'm not kidding. We all know space is at a premium when at a crop, so you can store a huge amount of supplies in a little bitty footprint.

That's it! My very favorite storage tips for getting your craft space organized. I hope you give some of these a try. Be sure to post your photos on the Deflecto Facebook page - I would love to see them!

Tuesday, October 3, 2017

Organizing for Back to School with Deflecto

Hello everyone!! Kymona from Kreative Kymona here today with a project on organizing for back to school with Deflecto products.

Regular pens and pencils are always hard to find in my house.  I'm constantly looking for one. (My craft supplies can't be used for everyday writing, LOL!)  So I decided to use Deflecto's Stackable Cube Organizer X-Divider to organize all of my daughter excess school supplies.

Let's take a look:


Regular pens and pencils are always hard to find in my house.  I'm constantly looking for one. (My craft supplies can't be used for everyday writing, LOL!)  So I decided to use Deflecto's Stackable Cube Organizer X-Divider to organize all of my daughter excess school supplies.

Here are some fun facts about his stackable cube organizer:
  1. It's transparent!  You can see exactly what is in this organizer.
  2. It's perfect for pens, pencils, scissors, markers, crayons, etc.
  3. It is stackable.  It comes with clips that allow you to clip two or more cubes together.
  4. The x divider is removable.

Here's how I decorated the organizer:

I used the Brother ScanNCut to design and cut out vinyl to add the names of each item on all four sides.


Super easy, clean and simple.

So what do you think? How will you organize your back to school supplies? I would love to hear from you.

 Thanks for stopping by, I hope you were inspired here today.

~Kymona

Make sure to follow us on PinterestFacebook, and Instagram for more inspiration!
Don't forget you can purchase the Stackable Caddy HERE at Target.

Tuesday, September 26, 2017

Classroom Decor with Deflecto

School is back in session! As teachers decorate their classrooms, they will find Deflecto products to be a great help for getting organized and making signs!


Materials:

Deflecto: Frame; 5" x 7" black border #69575CR; Storage: 6" x 6" x 6" X-Divider Cube #350201CR; Sign Tags include 1 white marker #899112CR

Memory Paper: 12" x 12" multi-colored chevron, 12 x 12" mini yellow chevron

Cardstock: Black

Kids Wood Shapes: pre-painted: 2 owls, one bumblebee

Stencil: 1" alphabet sheet

Embroidered letters: sheet of 1" white letters (to spell teachers name)

School supplies: pencils, rulers, scissors, glue, etc.

Adhesives

Paper Trimmer


Instructions:

1. Frame: Cut a 10-1/2" x 12" rectangle of chevron paper. Cut a 5-1/2" x 10-1/2" rectangle of black cardstock. 

2. Use the stencil and white marker to write Welcome and the room number on the black cardstock.  Adhere the black to the chevron paper. Insert between the panels of the frame.

3. Adhere the owl shapes to the frame.

4. Stencil the teacher's name as for the sign on a sign tag using the marker. There may be more than one teacher in the classroom, and multiple names can be put on signs to interchange when needed.

5. Cube Storage: Cut chevron paper into four 5-1/2" squares. Insert inside the four sides of the cube. Press up against the cube. If the paper isn't glued, it can be changed.

6. Cut a piece of mini yellow chevron slightly larger than a sign tag. Adhere the sign tag to the paper. Adhere embroidered letters spelling the teacher's name to the sign. Adhere to the front of the cube. Adhere the bumblebee to the cube as shown.

7. Finish: Fill the cube with pencils, rulers, scissors, etc.

Stencil the message using the white marker.


Embroidered letters spelling the teacher's name on the sign tag.


Decorate to suit your classroom and enjoy!


May teachers and students enjoy a wonderful and productive school year! It is my hope that you have found some inspiration on the blog today!

Make sure to enjoy the small blessings along the way and
Live Life with a Flourish!

Marilyn

Tuesday, September 19, 2017

Back To School Organization: Creating A Dry Erase, Magnetic Board For The Family

Hi Everyone!
My name is Alexandra, I blog in a little corner of the crafty web called Hedgehog Hollow, I am so excited to be here as part of the new Deflecto design team. This month the theme was children. My oldest daughter is so disorganized and I knew as soon as I saw the Deflecto Craft Frame with Black Border, I had the perfect idea. Something for her to write notes on, for us to write reminders or fun phrases on and for her to hold up sentimental or important notes was important too, this is what I came up with...

I inserted some magnet paper in the back so she could pin up items, in the picture above I added the card I made her for getting her pen license at school plus her favorite picture of her baby sister. I personalized it with glitter vinyl saying 'Maddi's Notes' that I cut on my Silhouette Machine; I also added some silver glitter vinyl on top of the magnet paper to add some extra sparkle! The acrylic surface of the Deflecto Frame also makes the perfect dry erase board, I added an inspirational comment above and some more reminders in this picture...


I also placed all her stationery in the Deflecto Stackable Cube with X Dividers. I have one of these too with some of my craft supplies in, they are so useful! This could be personalized for any age or for the whole family with important information or reminders, you could adapt the colors and level of sparkle for the recipient, I would like one of these for my desk to add my to do list on or pin up meetings I need to attend. 

Thanks for stopping by today, I hope you will join me and my fellow designers very soon for some more Deflecto organization ideas.

Happy Creating!
Alexandra
Related Posts Plugin for WordPress, Blogger...