
Happy March! St. Patrick's Day and Easter are in the same month. I love Spring! Everything is fresh, new and green. I have created a fun pocket album with a hint of the green! Stay tuned here to see how I made it!

 Supplies you will need:
Sign Tags w/Wet Erase Markers
Embossing Folder: Damask, 5" x 7"
Embossing machine
Green Sacks: 3.5" x 2" x 6.75
Cardstock: Black and White 8-1/2" x 11"
Paper Sander
Grosgrain Ribbon: 5/8" black and white polka dots
Picot Ribbon: 1/4" black
Adhesive
Binding Rings: 1", two per album
Scissors
Paper Trimmer
Paper Drill (To punch holes in the paper and the sign tags)
Ephemera to decorate album
Charms of your choice

Instructions:
1. Emboss the sign tags. Use the paper sander and sand against the grain of the embossed design. This will add definition to the design.
2. Use the paper drill and punch holes in the sign tag album covers as shown.

3. Mark the bags to match the punched holes in the sign tag album covers. Punch holes in the bags, with the gusset of the bag facing up.

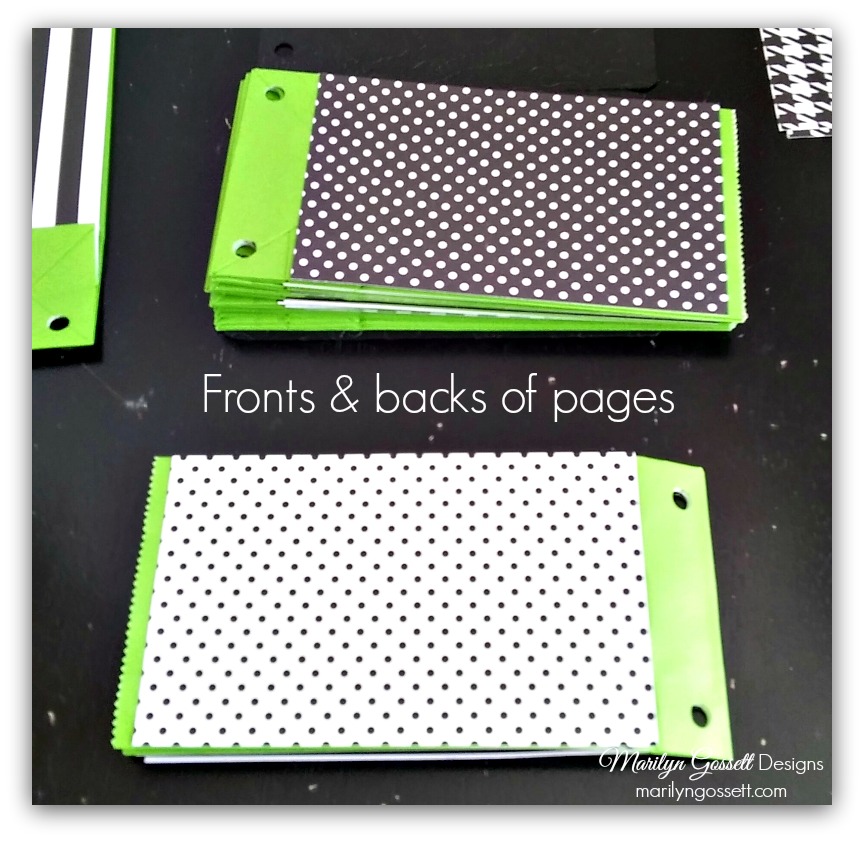
4. Cut the different papers into 3-1/2" x 5-1/2" rectangles. It will take four pieces of paper to decorate each bag. With the bag gusset facing up; adhere the paper to the bottom half of the gusset only. This will be the first page. Open the first page, match the edges and adhere a contrasting piece of paper to the wrong side of the paper.

5. Match the edges and adhere a contrasting paper rectangle to the white side of the paper. (If this is a paper with a design on each side disregard this step. Adhere another contrasting paper to the top of the sack, then one to the back side.


Deflecto products are available through local art, craft, and educational stores, in addition to online retailers such as Amazon.com, Scrapbooking.com, and Scrapbooking Made Simple. To find a local retailer, click HERE and enter your zip code to see where you can purchase Deflecto Craft products near you.

Sign Tags w/Wet Erase Markers
Embossing Folder: Damask, 5" x 7"
Embossing machine
Green Sacks: 3.5" x 2" x 6.75
Cardstock: Black and White 8-1/2" x 11"
Paper Sander
Grosgrain Ribbon: 5/8" black and white polka dots
Picot Ribbon: 1/4" black
Adhesive
Binding Rings: 1", two per album
Scissors
Paper Trimmer
Paper Drill (To punch holes in the paper and the sign tags)
Ephemera to decorate album
Charms of your choice

Instructions:
1. Emboss the sign tags. Use the paper sander and sand against the grain of the embossed design. This will add definition to the design.
2. Use the paper drill and punch holes in the sign tag album covers as shown.

3. Mark the bags to match the punched holes in the sign tag album covers. Punch holes in the bags, with the gusset of the bag facing up.

4. Cut the different papers into 3-1/2" x 5-1/2" rectangles. It will take four pieces of paper to decorate each bag. With the bag gusset facing up; adhere the paper to the bottom half of the gusset only. This will be the first page. Open the first page, match the edges and adhere a contrasting piece of paper to the wrong side of the paper.

5. Match the edges and adhere a contrasting paper rectangle to the white side of the paper. (If this is a paper with a design on each side disregard this step. Adhere another contrasting paper to the top of the sack, then one to the back side.
Above is a photo of how the pocket page is showing the opening in the sack.

6. Place the pages between the album covers. Insert the binding rings to secure the album. Tie pieces of ribbon around each binding ring.
7. Attach some charms by threading them onto a piece of the picot ribbon. Tie a knot in the ribbon to secure the charms. Thread one end of the picot ribbon through a binder ring and tie in a knot to secure. Trim the ribbon ends.
8. Select your ephemera and photos and decorate the inside of your album! You can add small pockets, sentiments, photos, etc. The album is ready for your special touches!
Enjoy!
Make sure to take time to enjoy the small blessings along the way and,
Live Life with a Flourish!


No comments:
Post a Comment
Thank you for your comments, they are always appreciated!